
12 Inspiring Garage Man Cave Ideas That Make Your Garage More Organized and Functional

Your garage holds massive potential. Most people waste this square footage on old boxes and forgotten clutter. You can turn this neglected area into an awesome hangout spot. A true garage man cave gives you a personal retreat. It combines heavy-duty storage with ultimate relaxation. You get a space to work on hobbies, watch the game, and hang out with friends. Best of all, you do not need a massive budget to make this happen. Smart planning and simple organization tricks will help you reclaim your floor space. Let us explore twenty practical ways to build the ultimate garage sanctuary.
1. Install Heavy-Duty Overhead Storage Racks

Overhead racks save your floor space. Look up at your ceiling. That empty air is prime storage real estate.
Install heavy-duty ceiling racks above your garage door area. This spot rarely gets used for anything else.
Put seasonal gear, camping equipment, and holiday decorations up high. Keep them out of sight until you actually need them.
You can buy commercial kits at any hardware store. They bolt right into your ceiling joists.
Budget-friendly tip: Build your own hanging wooden platform using 2x4s and threaded steel rods.
Make sure you anchor everything securely into the studs. Safety comes first when hanging heavy loads over your head.
Label every single plastic storage tote with a bold marker. You will save hours of frustration later.
Clear bins work even better than opaque ones. You can see the contents without pulling down every single box.
Keep a lightweight step stool nearby. Store it in a designated wall hook so you can reach your gear fast.
This simple weekend project clears floor clutter instantly. Your future self will thank you every time you walk into the room.
2. Build a Custom Modular Workbench

Every man cave needs a solid work surface. Skip the flimsy store-bought tables. Build a custom wooden workbench instead.
Use thick 4×4 posts for the legs. Top the frame with a heavy butcher block slab.
You will get a rock-solid station for fixing gear, building projects, or tinkering with engines.
Mount a heavy-duty vise on one corner. Bolt it straight through the wood for maximum strength.
DIY example: Screw a power strip directly to the side of the bench. You will always have plug-ins ready for your sander or phone charger.
Sand the wooden top smooth. Seal it with polyurethane so motor oil and paint spills wipe right off.
Keep your most-used hand tools within arm's reach. Use magnetic strips bolted along the front edge of the bench.
Slide rolling plastic drawer units underneath the table. Use them to sort screws, drill bits, and sandpaper.
Good lighting is mandatory here. Hang a bright LED shop light directly overhead.
You now have a functional hub for all your hands-on hobbies. It looks great and handles heavy abuse.
3. Mount a Full-Coverage Pegboard Wall

Pegboards keep your tools visible and accessible. Stop digging through messy metal toolboxes.
Mount large metal pegboard panels across your main workshop wall. Steel panels hold much more weight than old fiberboard versions.
Arrange your hammers, wrenches, and screwdrivers in neat rows. Draw outlines around each tool with a permanent marker.
You will instantly notice if something is missing. Cleaning up takes mere seconds at the end of the day.
Budget-friendly tip: Buy standard hardboard pegboard sheets. Paint them matte black or dark gray for a modern look.
Use heavy-duty mounting spacers. This leaves a gap behind the board so your peg hooks can lock in tight.
Group similar tools together. Keep automotive tools in one section and gardening tools in another.
Hang smaller wire baskets on the pegboard for loose items. Toss tape measures, safety glasses, and chalk lines inside.
Wipe down the board occasionally to keep dust at bay. Your garage walls will transform into an organized display.
This setup brings order to chaos without breaking the bank. It also looks super professional.
4. Lay Down Interlocking Rubber Floor Tiles

Bare concrete floors feel cold and look messy. Cover them with interlocking rubber floor tiles.
These tiles absorb sound and cushion your feet. Standing for hours on concrete hurts your back and joints.
Rubber flooring changes the entire vibe of the space. It feels like a high-end gym or a proper lounge.
DIY example: Sweep your concrete floor completely clean. Snap the puzzle-edge tiles together by hand using a rubber mallet.
Trim the edges near the walls with a sharp utility knife. The tight fit keeps everything locked in place.
Spilled oil or drinks wipe up easily from the rubber surface. You do not have to worry about permanent stains on your concrete.
Choose a textured coin pattern or diamond plate design. Both options provide great traction even when wet.
You can create cool patterns using contrasting tile colors. Try making a bold border or a checkerboard center.
These tiles protect your dropped tools from shattering. They also insulate the room against ground chill during winter.
Your garage instantly stops feeling like a damp storage shed. It starts feeling like a real room.
5. Set Up a Dedicated Mini-Fridge and Snack Station

Hard work and relaxation require cold refreshments. Bring a mini-fridge and snack station right into your garage zone.
You will not need to run back inside the main house every time you want a cold drink.
Place the compact refrigerator on a sturdy low cabinet. This raises it up so you do not have to bend down too far.
Budget-friendly tip: Find a used mini-fridge online. Clean the inside with vinegar and give the outside a coat of chalkboard paint.
Stock the door with your favorite beverages. Use the shelves for quick snacks like pretzels, nuts, and beef jerky.
Mount a bottle opener directly to the side of the cabinet. Catch the caps in a small magnetic bin underneath.
Keep a stash of paper towels and wet wipes nearby. Garages get dusty, and sticky fingers happen.
Add a microwave if you want to heat up hot pockets or popcorn.
This station keeps you fueled during long project sessions. It also makes your garage the ultimate hangout spot for game nights.
6. Hang a French Cleat Tool Storage System

French cleats offer the ultimate modular wall storage. You cut wooden strips at a 45-degree angle.
Screw one strip to the wall and the matching strip to your tool holders. They lock together securely using gravity.
You can rearrange your shelves, drill holders, and box storage in seconds. Lift them off and slide them somewhere else.
DIY example: Rip a sheet of plywood down with a table saw set to a 45-degree angle. You will get dozens of cleats from a single board.
Build custom wooden cradles for your cordless drills and sanders. Attach the cleat backing to each cradle.
Your tools will hang flush against the wall. Nothing wobbles or falls off when you bump into it.
Paint the wall behind the cleats a dark accent color. The natural wood grain of the cleats will pop against the dark paint.
This system grows with your tool collection. Build new holders whenever you buy new gear.
It keeps counters completely clear of clutter. Your workspace stays clean and ready for action.
7. Install a Wall-Mounted Entertainment Center

Entertainment makes a man cave complete. Mount a flat-screen television right on the main wall.
Keep sports games, movies, and background music playing while you work or relax.
Build a protective wooden housing with doors if you worry about dust. Close the doors when you are cutting wood or grinding metal.
Budget-friendly tip: Use a basic articulating wall mount. You can swivel the screen toward your workbench or swing it toward your couch.
Run your HDMI and power cords through an in-wall PVC conduit. This hides ugly wires and keeps critters from chewing them.
Mount compact stereo speakers in the corners of the room. Connect them via Bluetooth to your phone.
Install a streaming stick so you have access to all your favorite apps.
Keep the remote control in a dedicated wall holster. You will never lose it under a pile of rags.
This setup turns your garage into the best seat in the house. Game days will never be the same.
8. Build a Fold-Down Murphy Bar

Space management matters in a garage. A fold-down Murphy bar gives you entertaining space without wasting floor footprint.
Mount a slim wooden cabinet flat against your wall. Install heavy-duty folding hinges on the drop-down front panel.
When closed, it looks like a simple wall cabinet. When open, the door drops horizontal to serve as a drink mixing counter.
DIY example: Use pine boards and a couple of decorative chains to support the weight of the drop-down shelf.
Install small wooden racks inside the cabinet for your favorite bottles. Add a stemware rack underneath the top shelf for glasses.
Put a magnetic catch on the door so it stays firmly shut when not in use.
Stain the wood a rich dark walnut color. It adds a touch of class to the industrial garage environment.
You can fold it flat out of the way when you need to park your car inside.
This clever feature surprises every guest who visits your man cave. It combines function with a fun hidden trick.
9. Upgrade to Bright LED Shop Lighting

Good lighting changes everything. Dim garages feel cramped and make detailed work tough.
Replace old yellow fluorescent tubes with bright LED shop lights.
Link several light fixtures together in a daisy chain. Hang them from the ceiling joists using light-duty chains.
You will banish shadows from every corner of the room. Working on engines or electronics becomes much easier on your eyes.
Budget-friendly tip: Choose lights with a daylight color temperature of 5000K. They provide crisp, clean illumination.
Install a motion sensor switch by the main entry door. The lights turn on automatically the second you walk inside.
Add under-cabinet LED strip lights beneath your workbench shelves. They light up your exact working surface.
Energy-efficient LEDs last for years without burning out. You also save money on your monthly electric bill.
Bright light makes the room feel twice as large. Say goodbye to dark corners and squinting.
10. Roll Out a Heavy-Duty Area Rug

Concrete floors need softness in a lounge area. Roll out a heavy-duty area rug under your seating zone.
Choose a durable indoor-outdoor synthetic rug. Polypropylene fibers resist moisture and clean easily with a garden hose.
A good rug anchors your furniture layout. It defines the lounge space away from the messy workshop area.
Budget-friendly tip: Look for commercial carpet remnants at local flooring stores. Have the edges bound for a custom rug at a fraction of retail cost.
Pick a dark pattern that hides occasional dust and footprints. Plaid or distressed geometric designs work wonderfully in a garage.
Secure the corners with carpet tape so nobody trips.
Vacuum the rug regularly with a shop vacuum. You can also drag it outside on sunny days for a deep clean.
This addition adds color and texture to the room. It brings indoor comfort right into your workspace.
11. Build a Rolling Lumber and Pipe Cart

Long materials create major storage headaches. Stacking them on shelves makes a mess.
Build a rolling lumber and pipe cart on heavy-duty casters.
Store your 2x4s, trim boards, and PVC pipes vertically in separate bins. You can see what you have at a single glance.
DIY example: Build a simple plywood box base with divider walls. Screw four locking caster wheels to the bottom corners.
Roll the entire cart out into the driveway when you need to sort through your stock.
Push it back against the garage wall when you finish your project. It tucks neatly into dead space next to your workbench.
Add side hooks to hang rolls of tape, string, and extension cords.
This mobile rack saves you from digging through dangerous overhead stacks.
Organization keeps your projects moving smoothly. You spend less time searching and more time building.
12. Install Weather-Stripping and Insulation

Garages suffer from extreme temperature swings. Fix this with weather-stripping and insulation.
Install rubber threshold seals along the bottom of your garage door. This blocks wind, rain, and crawling bugs.
Add foam weather-stripping around the side door frames.
Budget-friendly tip: Glue rigid foam insulation boards to the inside panels of your metal garage door. Cover them with white plastic panels for a clean finish.
Insulate your exterior walls if they are currently bare stud bays. Cover them with drywall or pegboard panels.
You will keep the summer heat outside and trap your winter heater warmth inside.
Add a small ductless mini-split heat pump if your budget allows. You can control the climate year-round.
Comfort lets you enjoy your man cave in any season. No more freezing in January or sweating in July.
13. Create a Dedicated Charging Station for Tools

Cordless power tools need constant power. Build a dedicated charging station to keep everything ready.
Mount a sturdy wooden shelf near your workbench. Screw a surge protector strip directly to the top surface.
Plug all your battery chargers into this single strip.
DIY example: Cut vertical slots in a piece of plywood. Slide your drill bodies into the slots so they hang neatly under the shelf.
Keep your spare lithium-ion batteries clicked into their chargers. They will always be topped off for your next project.
Label the charging cords so you never unplug the wrong device.
Add a small wire basket underneath for loose charger blocks and extra attachments.
This stops the clutter of scattered cords across your work tables. Everything stays in one neat, functional spot.
14. Hang Heavy Gear on Wall Track Systems

Wall tracks maximize your vertical surface area. Mount aluminum slatwall or rail systems directly to your wall studs.
These tracks hold hundreds of pounds of gear. You can clip on specialized hooks, baskets, and shelf brackets.
Hang your bicycles, extension ladders, and wheelbarrows completely off the floor.
Budget-friendly tip: Buy modular rail kits from home improvement stores. They cost less than full wall panel systems and install in minutes.
Snap heavy rubber-coated J-hooks into the tracks to hold awkward items safely.
Slide the hooks left or right whenever you want to adjust your layout.
You can add or remove attachments as your gear collection changes over time.
Keep your floor completely clear for easy sweeping. Walking through your garage becomes safe and hazard-free.
15. Set Up a Comfortable Lounge Seating Area

A man cave needs a place to sit back. Bring in a comfortable lounge seating arrangement.
Leather or vinyl couches work best in a garage environment. They wipe clean easily and do not absorb workshop dust like fabric upholstery.
Budget-friendly tip: Rescue a durable second-hand leather sofa from online classifieds. A few scratches add character to a garage setting.
Build a coffee table out of four old wooden shipping crates screwed together. Store extra magazines or blankets inside the crate openings.
Place a small floor lamp next to the sofa for reading blueprints or books.
Keep a box of coasters on the table to protect the wood.
This seating zone separates your relaxation time from your hard work time.
Kick your feet up after a long day of building. Your garage now doubles as a private living room.
16. Install a Smart Keypad and Security Camera
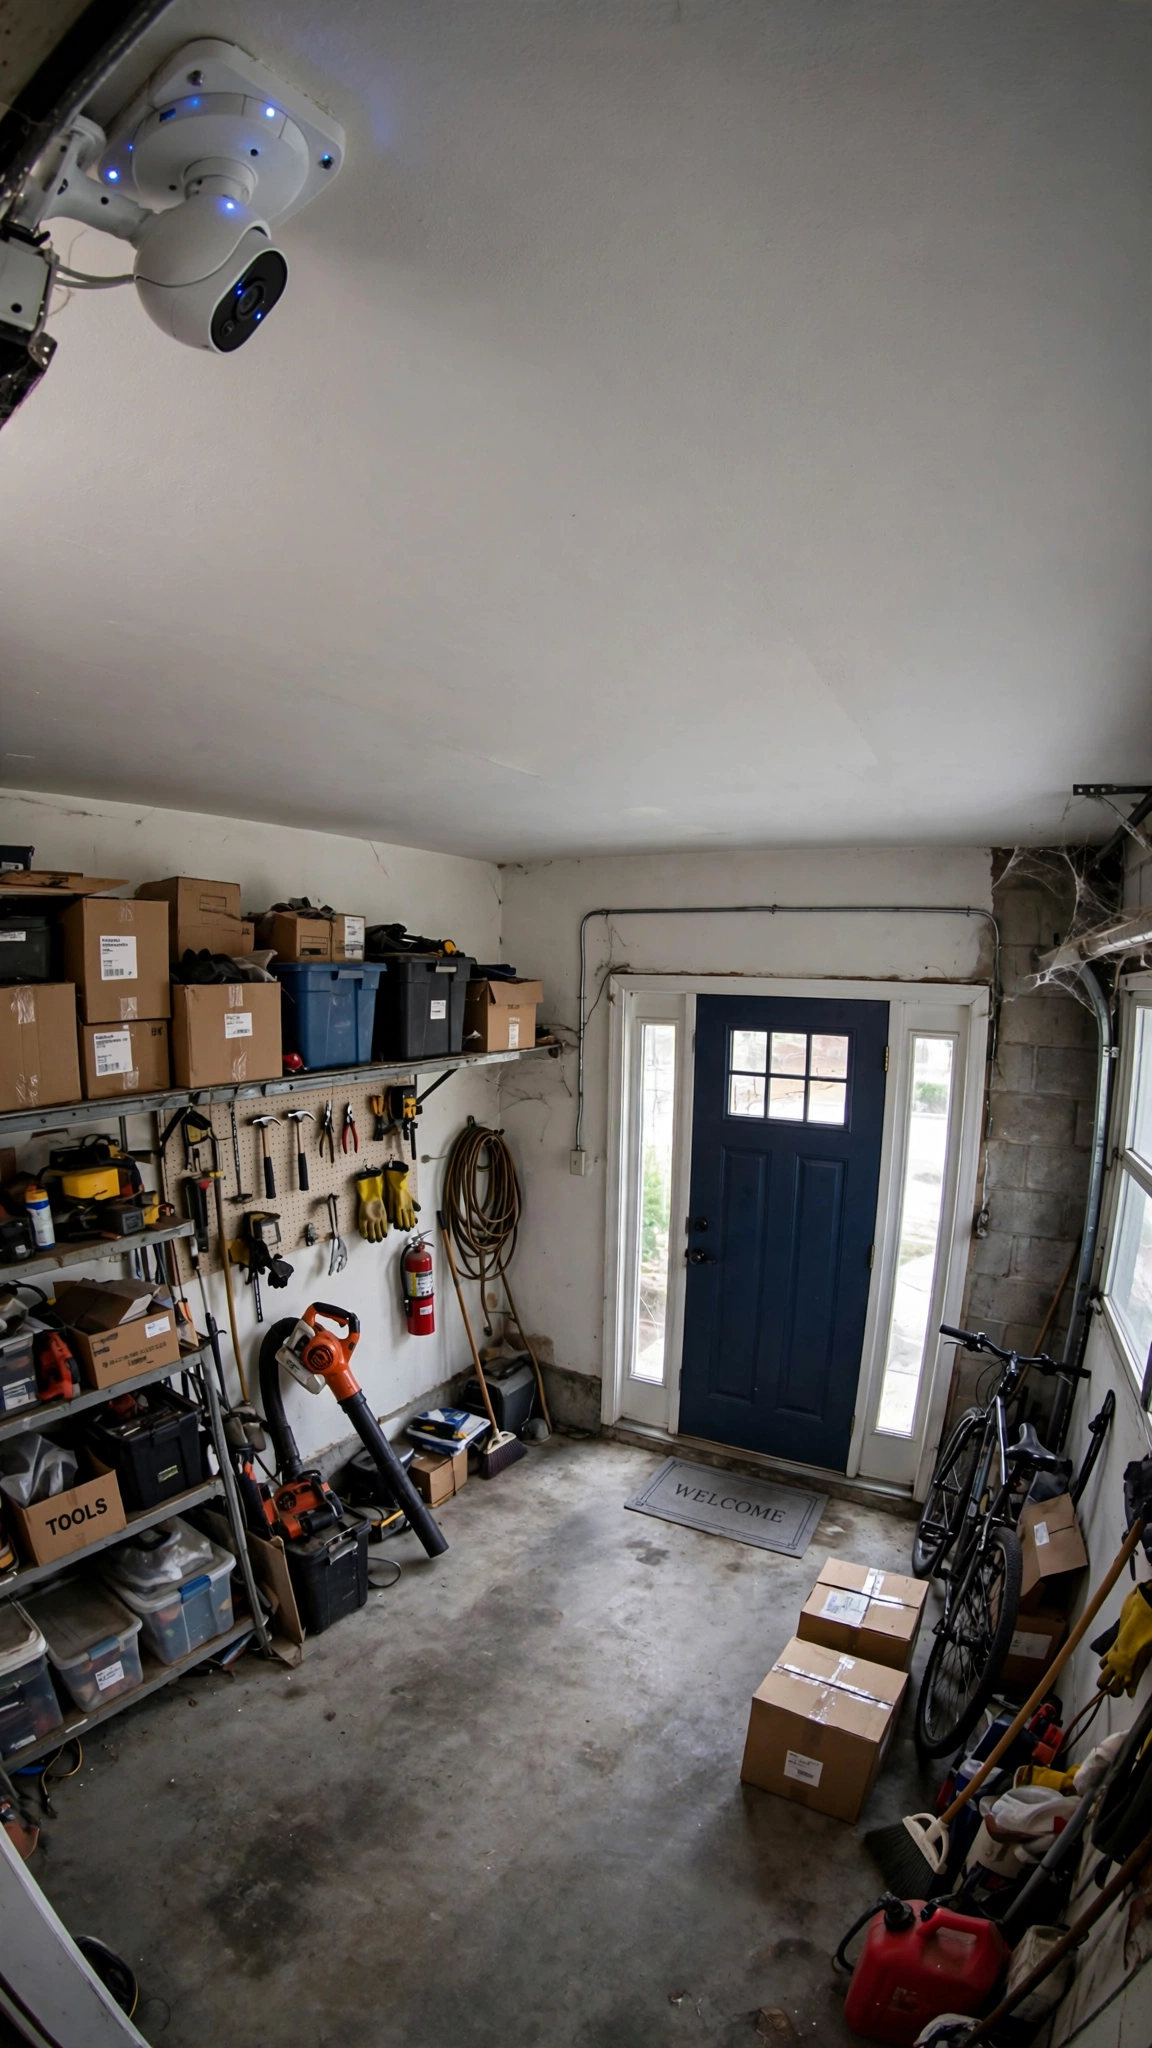
Protect your investment and gear. Install a smart keypad and security camera system.
Mount a wireless security camera in the upper corner of the room. You can check on your tools and space right from your phone.
Install a wireless keypad outside your side door for easy entry without physical keys.
Budget-friendly tip: Use battery-powered Wi-Fi cameras that connect to your home network without complicated wiring.
Set up motion alerts so you know when someone opens the garage door.
Add a smart garage door opener so you can close it remotely if you forget.
Security gives you peace of mind when you store expensive tools and electronics in the space.
Your man cave remains your private domain. You control who enters and when.
17. Build a Custom Rolling Storage Cart

Mobile storage goes where you go. Build a custom rolling storage cart for your current projects.
Use 2×4 framing and plywood shelves to create a sturdy three-tier cart.
Screw large locking swivel casters to the bottom corners.
DIY example: Drill round holes into the top shelf of the cart. Slide your most-used spray paint cans or glue bottles into the holes so they do not tip over.
Roll the cart right up to your car when you are detailing the interior.
Wheel it over to your woodworking station when you need clamps and glue.
Park it in a corner when you finish your workday.
This cart acts as an extra pair of hands in the shop. It keeps your immediate workspace free of clutter.
18. Hang Industrial Metal Wire Baskets
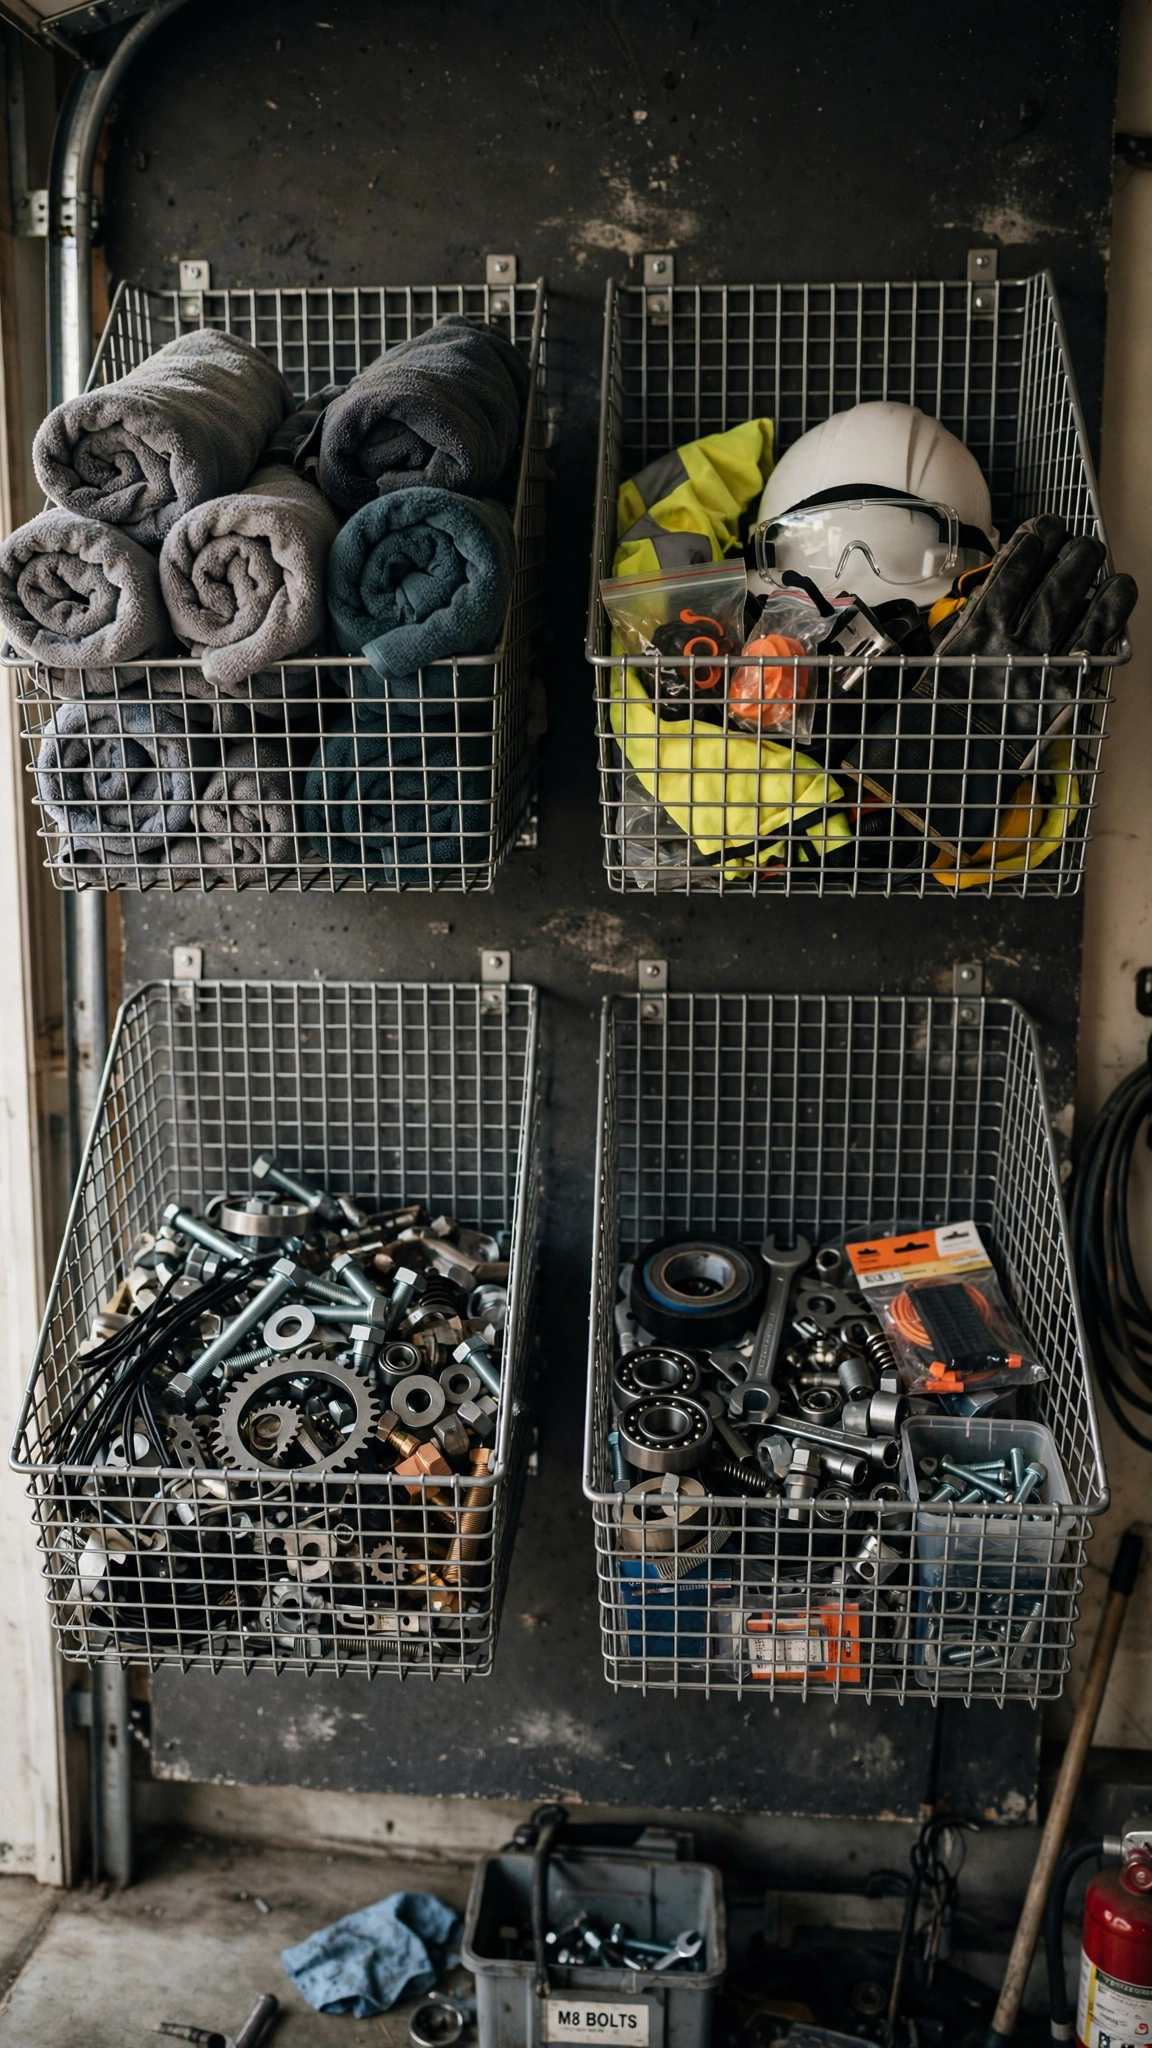
Small items get lost on deep shelves. Hang industrial metal wire baskets along your walls for clear visibility.
Wire mesh lets you see what is inside from across the room. Dust and dirt fall right through the bottom instead of pooling inside.
Budget-friendly tip: Repurpose old locker baskets or grocery display wire racks. Mount them with simple zip ties or wall brackets.
Use baskets to hold rolls of electrical tape, sanding discs, and safety masks.
Keep a basket by the door for hats, gloves, and sunglasses.
Mount them at eye level so you never have to hunt for small accessories.
These baskets add a rugged, industrial aesthetic to your walls. They organize clutter in seconds.
19. Add Personal Decor and Vintage Signs

Personalize your retreat with vintage signs and custom decor.
Hang old license plates, classic car metal signs, or custom wood-burned name plaques.
Paint an accent wall in your favorite sports team colors or a dark industrial charcoal tone.
Budget-friendly tip: Print out high-resolution automotive blueprints. Frame them in cheap black frames for instant custom wall art.
Hang a neon or LED sign over your seating area for cool ambient glow at night.
Display your favorite old sports memorabilia, vintage helmets, or license plate collections.
This finishing touch turns a generic workshop into your personal space. It reflects your unique personality and hobbies.
Your friends will immediately recognize this room as your own.
20. Install a Dust Collection and Ventilation System

Keep your air clean and breathable. Install a dust collection and ventilation system.
Woodworking and grinding create fine dust that settles on everything.
Hang an air filtration unit from your ceiling joists. It pulls ambient dust right out of the air while you work.
Budget-friendly tip: Strap a standard box fan to a high-efficiency furnace filter using bungee cords. Turn it on high while sanding or painting.
Install a through-wall exhaust fan to blow out chemical fumes and paint odors quickly.
Keep your workspace healthy and pleasant. You will not cough up sawdust after a long afternoon of projects.
Clean air protects your lungs and keeps your electronics dust-free.
Your man cave stays fresh, clean, and comfortable year-round.
Conclusion
Transforming your garage into an organized and functional man cave brings incredible rewards. You reclaim wasted square footage and create a dedicated escape for your hobbies. Simple steps like adding overhead storage, laying down rubber flooring, and building custom workbenches make a massive difference. You do not need professional contractors or endless funds to achieve amazing results. Take on one project at a time this weekend. Clear out the clutter, set up your gear, and enjoy your brand new space.




4 Comments