
13 Stunning Garage Workshop Layout Ideas That Make Your Garage More Organized and Functional

A cluttered garage drains your energy before a project even begins. Piles of scrap wood, tangled cords, and scattered hand tools turn simple weekend repairs into frustrating scavenger hunts. Building an efficient workspace does not require hiring custom contractors or spending thousands of dollars on steel cabinetry. You can reclaim your floor, park your car inside again, and build dedicated work zones using basic lumber and smart spatial planning. The following floor layouts show you how to turn raw square footage into an efficient, tidy workstation tailored to your favorite hobbies.
1. The Perimeter Wall Runner

Run a continuous surface along your longest garage wall to preserve vehicle parking. A shallow depth of twenty inches keeps walkways clear while giving you plenty of surface area.
Frame the surface using simple two-by-fours bolted straight into wall studs. Top it with smooth, affordable sheet plywood.
Hang your drills, drivers, and daily items at eye level using basic metal hooks. Store heavy storage tubs directly on the floor underneath.
This simple setup eliminates floor clutter quickly. It costs under seventy dollars in raw lumber and keeps your primary floor bay open.
2. The L-Shaped Corner Hub

Corner space often turns into a graveyard for broken rakes and cobwebs. An L-shaped workbench claims that dead corner and doubles your available work surfaces.
Place your miter saw on one side and leave the adjacent side clear for assembly work. This setup keeps long boards supported without buying expensive saw stands.
Build the corner frame using leftover framing wood. Reinforce joints with budget-friendly metal corner braces from the hardware store.
Keep your small hardware jars on small corner shelves above. Everything stays within arms reach while you work.
3. The Mobile Island Anchor

A rolling island offers unmatched flexibility in a single-car garage. Roll the table outside when cutting dusty drywall or sweeping up sawdust.
Lock the wheels when you return inside to assemble furniture or repair lawnmowers. Heavy three-inch locking casters make the difference here.
Add a bottom shelf made from scrap boards to hold portable table saws or sanders. The added low weight keeps the island stable during hard work.
Salvage an old solid-core wooden door for the top surface. It provides a flat, rock-solid table without expensive butcher block prices.
4. The Fold-Down Mobile Center

If floor space is tight, a wall-mounted drop-leaf table saves the day. It folds flat against the wall when you park your car.
Lift the table up and swing out two hinged legs when you want to sand, glue, or paint. Heavy utility hinges secure the frame directly into your wall studs.
Glue two layers of three-quarter-inch plywood together for a stout, zero-flex top.
Mount a slim shallow magnetic bar directly above the folded table. Your chisels, screwdrivers, and pliers stay organized without taking up an inch of floor space.
5. The Single-Wall Galley

Galley setups borrow smart design concepts straight from compact apartment kitchens. Line one side wall with narrow base cabinets and overhead shelving.
Check online classifieds for people giving away old kitchen cabinets during home remodels. Sand them down, apply leftover paint, and bolt them into your wall studs.
These cabinets hide messy items like oil jugs, spray cans, and paint trays behind closed doors.
Leave a forty-inch gap in the center of the run. That opening becomes your standing workstation, framed neatly by deep storage on both sides.
6. The Ceiling-Suspended Sanctuary

Look up to discover your garage’s most neglected storage zone. Hanging platforms drop down from ceiling joists to hold seasonal items and camping supplies.
Build simple rectangular frames using two-by-fours and exterior plywood sheets. Secure the frames to ceiling beams with heavy threaded steel rods and locking washers.
Clear plastic tubs work best here so you can identify contents from down below.
Lifting bulky gear off the floor clears space below for a wide roll-around assembly cart. You gain open ground without adding square footage.
7. The French Cleat System

A French cleat wall allows you to rearrange your entire garage layout in seconds. Bevel-cut three-inch strips of plywood at a forty-five-degree angle across your wall.
Build matching custom holders for your circular saws, tape measures, and nail guns. These holders simply hook over the wall slats without screws.
Change your tool positions whenever your workflow changes.
Rip down one sheet of standard plywood to produce dozens of running feet of cleats. It remains one of the cheapest ways to banish tool piles forever.
8. The Under-Stairs Nook

The empty cavity beneath garage stairs frequently gathers dust and junk. Turn that odd architectural recess into a dedicated sharpening or sanding station.
Cut a small desktop surface to match the stairs' angle. Mount supporting ledgers directly to the exposed stringers and wall framing.
Add battery-powered tap lights underneath the steps to illuminate dark spots.
Install small stackable plastic drawers to hold sandpaper, glue tubes, and spare blades. This turns awkward dead space into a tidy, quiet corner for small tasks.
9. The Drive-Through Pass

A drive-through layout keeps storage on parallel side walls while leaving the center lane open for full-size vehicles.
Keep counters narrow on both sides so vehicle doors open without striking furniture. Use the left wall for mechanical tools and auto fluids.
Use the right wall for home maintenance supplies and garden equipment.
Color-code your tool bins with simple spray paint to keep tools in their assigned zones. You get full garage capacity while protecting your vehicle's paint.
10. The Rolling Carts Fleet

Replace one giant stationary bench with three identical rolling utility carts. Park them side by side along the wall to form one long counter.
Separate them across the room when tackling complex, messy builds. Dedicate one cart to your chop saw, another to sanding tools, and the third to hardware assembly.
Build all three frames identical using two-by-threes to save money on wood.
Tuck the carts beneath a deep wall-mounted shelf when work ends. You gain maximum flexibility for the price of basic utility wheels.
11. The Nested Double-Workbench

Build two tables, making one slightly smaller so it slides completely under the larger partner.
The tall table serves as your primary station for hand work and layout tasks. The lower roll-out table catches board cutoffs or holds benchtop planers.
Fit the smaller table with locking rubber wheels and recess the bottom crossbars.
This design doubles your usable surface area without taking extra space when parked. Use simple pine boards and deck screws to assemble the pair in an afternoon.
12. The Miter Saw Raceway

Cutting long trim boards on a small table feels dangerous and clumsy. Build a recessed drop-down pocket into a long counter so your saw deck sits flush.
Boards slide smoothly across the counter directly into the saw blade without rocking.
Build wings on both sides out of standard two-by-fours topped with slick hardboard.
Screw a stick-on measuring tape directly onto the counter edge. This trick saves time because you can measure cuts without pulling out your handheld tape measure.
13. The Wall-to-Wall Base Cabinet Grid

Covering your back wall with a unified run of base storage instantly makes the garage feel tidy.
Gather old desks, salvaged dressers, or mismatched cabinets from yard sales. Screw them together side-by-side, leveling them using scrap wooden shims underneath.
Cap the whole assembly with one unified sheet of stained plywood.
This creates a seamless look on a shoe-string budget. Store hand tools in the sliding drawers and larger power tool cases inside lower cabinets.
14. The Split-Car Bay Divider

If you share your garage with a family vehicle, divide the room into two defined zones.
Build a mid-room freestanding shelving rack between the bays. The open rack creates a wall without blocking light or airflow.
Store garden hoses and vehicle cleaning supplies facing the car side.
Keep your routers, clamps, and power tools facing the workshop side. This divider catches flying sawdust and stops wayward tools from scratching family vehicles.
15. The Vertical Lumberyard Tower

Horizontal wood racks quickly eat up entire garage walls. Storing boards vertically uses small floor areas and makes finding specific boards quick.
Build a low wooden base box divided into small bays using vertical conduit pipes. Lean long boards upward between the pipes toward the ceiling.
Line the bottom box with rubber floor mat scraps to keep board ends from splitting or slipping.
This small rack fits inside a two-foot square footprint. It holds hundreds of feet of lumber safely out of walking paths.
16. The Closet Concealment Setup

Not everyone wants their garage to look like an industrial machine shed. Convert an unused corner or alcove into a closeable utility closet.
Hang sliding bypass doors or basic fabric curtains across a five-foot section of wall.
Install deep wire utility shelving behind the cover to stack toolboxes, air compressors, and shop vacs.
Pull the doors shut when visitors arrive or when you park for the night. Your space looks calm and tidy in an instant without extra cleanup.
17. The Pipe-and-Plywood Modular Bay

Industrial black pipe creates rock-solid bench frames without complex wood joints or carpentry tools.
Thread basic galvanized or iron pipe pieces into floor flanges and tee fittings. Screw the top flanges straight into thick wooden tops.
Add an extra pipe crossbar down low to create an easy footrest.
Clamp shop lights, power strips, and paper towel holders directly onto the metal pipe legs. When you move houses, unscrew the pipes and pack the desk into a car trunk.
18. The Murphy-Style Flip Station

A flip-top station allows you to store two heavy bench tools in the footprint of one.
Mount a planer on one side of a pivoting wooden platform and a spindle sander on the other.
Pull two slide bolts, rotate the tabletop one hundred eighty degrees, and lock it back into place.
Build the rotating axle using a simple half-inch steel rod run through hardwood side supports.
This DIY setup eliminates heavy lifting and frees up massive counter area for active assembly.
19. The Cantilever Overhead Array

Long ladders and PVC pipes frequently steal wall space from hand tools. Build triangular cantilever brackets from scrap two-by-fours and bolt them high up on your studs.
The open-arm design allows you to lift ladders onto the rack without wrestling with complex hooks.
Slope the support arms slightly upward so items cannot roll off the edge.
This clears the critical four-to-six-foot eye-level band on your walls. That eye-level real estate can now hold fast-grab tool racks and battery charging bays.
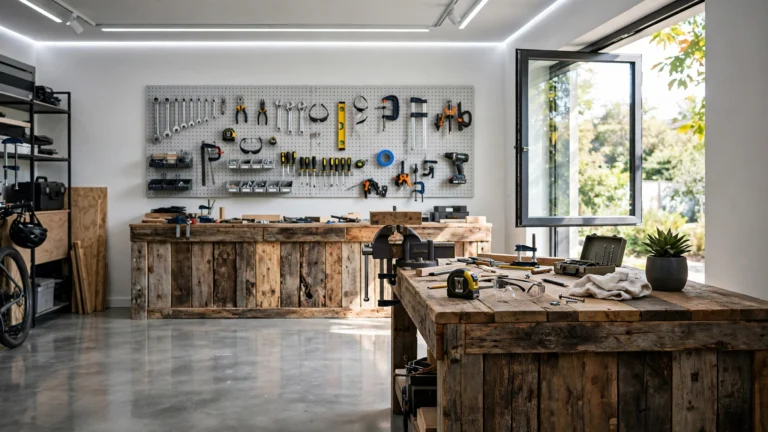
20. The Pegboard Command Post

Pegboard remains a legendary organizational surface for good reason. It offers endless customization for pennies per square foot.
Mount three-quarter-inch furring strips to the wall before screwing up your pegboard panels. The gap behind the board allows utility hooks to slide in without binding.
Trace your favorite hand tools with a black marker once you settle on an arrangement.
Missing tools stand out immediately when cleaning up at the end of a project. Paint the panel a bright white to bounce light onto your projects.
21. The Half-Bay Woodcraft Island

Dedicate exactly half of one parking bay to an all-in-one woodworking island.
Build a sturdy four-by-four-foot table centered in that space. Route simple T-tracks directly into the top surface for hold-down clamps.
Tuck a compact shop vacuum and bucket cyclone separator inside the table frame.
Wire a single heavy-duty power strip to the side of the island. Plug all your handheld sanders and routers into this central port to prevent trip hazards across the floor.
Conclusion
Transforming an untidy garage into a functional workspace comes down to deliberate spatial choices rather than expensive gear. By claiming bare studs, using ceiling space, and building rolling work surfaces, you gain complete control over your floor plan. Select one simple wall or corner idea this coming weekend, pick up a few framing boards, and start building. Once your tools hang within arm’s reach and your projects have room to breathe, working in your garage becomes an absolute joy.



6 Comments