14 Clever Garage Bike Storage Ideas That Maximize Space and Keep Everything in Order
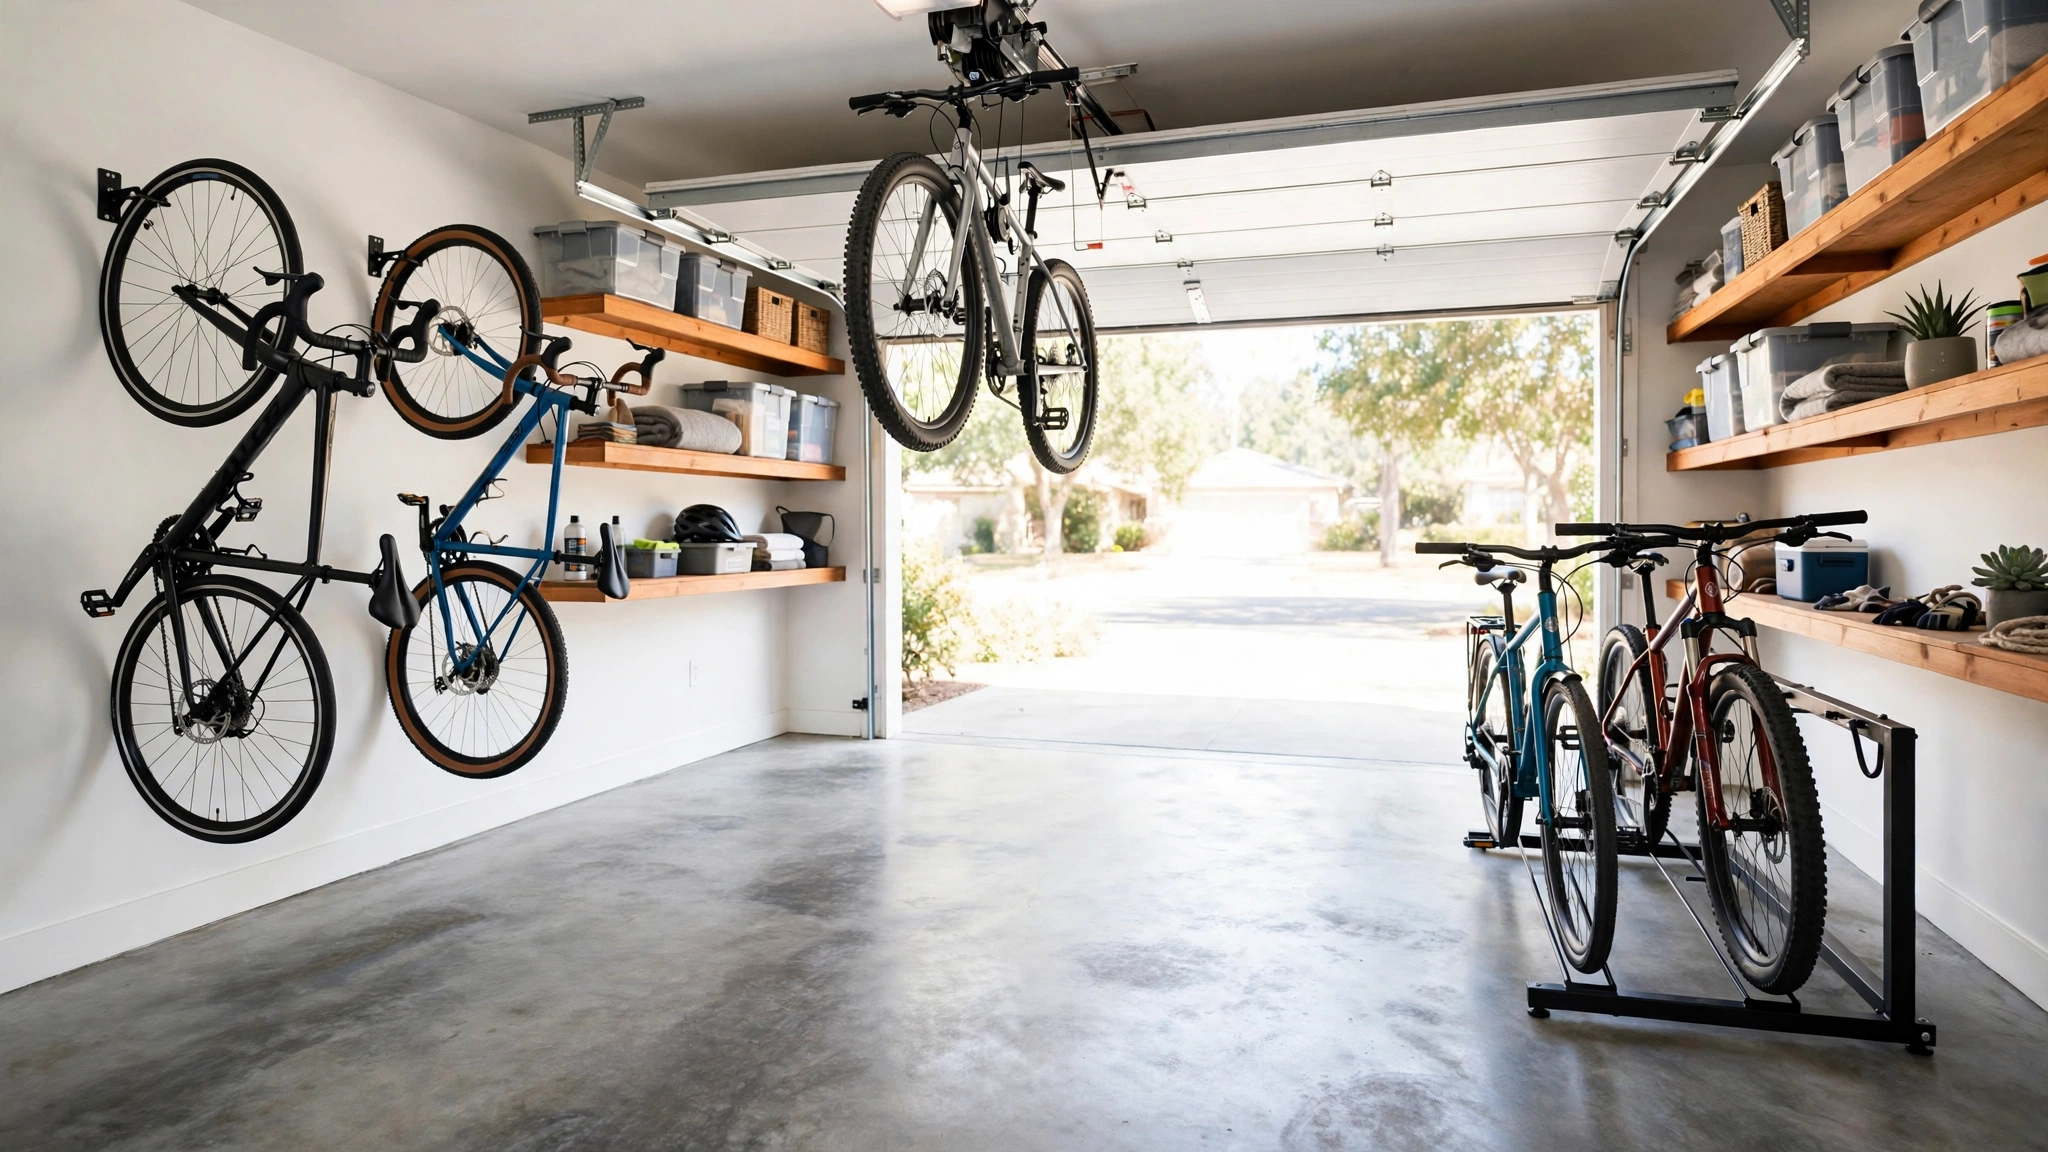
Bikes are wonderful until they take over your garage. One leaning against the wall becomes three, then the kids’ bikes join in, and suddenly you can’t reach the toolbox without performing gymnastics around handlebars and pedals.
The good news is that a bike doesn’t need a single square foot of floor space. With the right storage idea, every bike in your household can hang, slide, or tuck neatly out of the way — so which of these 14 clever solutions will you try first?
1. Mount Vertical Wall Hooks

Vertical wall hooks are the simplest way to get a bike off the floor. The bike hangs by its front wheel, flat against the wall, taking up barely more space than a framed poster.
Choose hooks rated for at least twice your bike’s weight, and always screw them into a stud — drywall anchors alone won’t survive a heavy mountain bike. Rubber-coated hooks protect your rims from scratches.
Space the hooks about two feet apart so handlebars don’t tangle. In a single-car garage, one wall can hold the whole family’s bikes this way.
Pro tip: Pair wall hooks with sturdy shelving above the bikes for helmets and gear — see these garage shelving ideas for layouts that keep everything in reach.
2. Install a Sliding Bike Rail
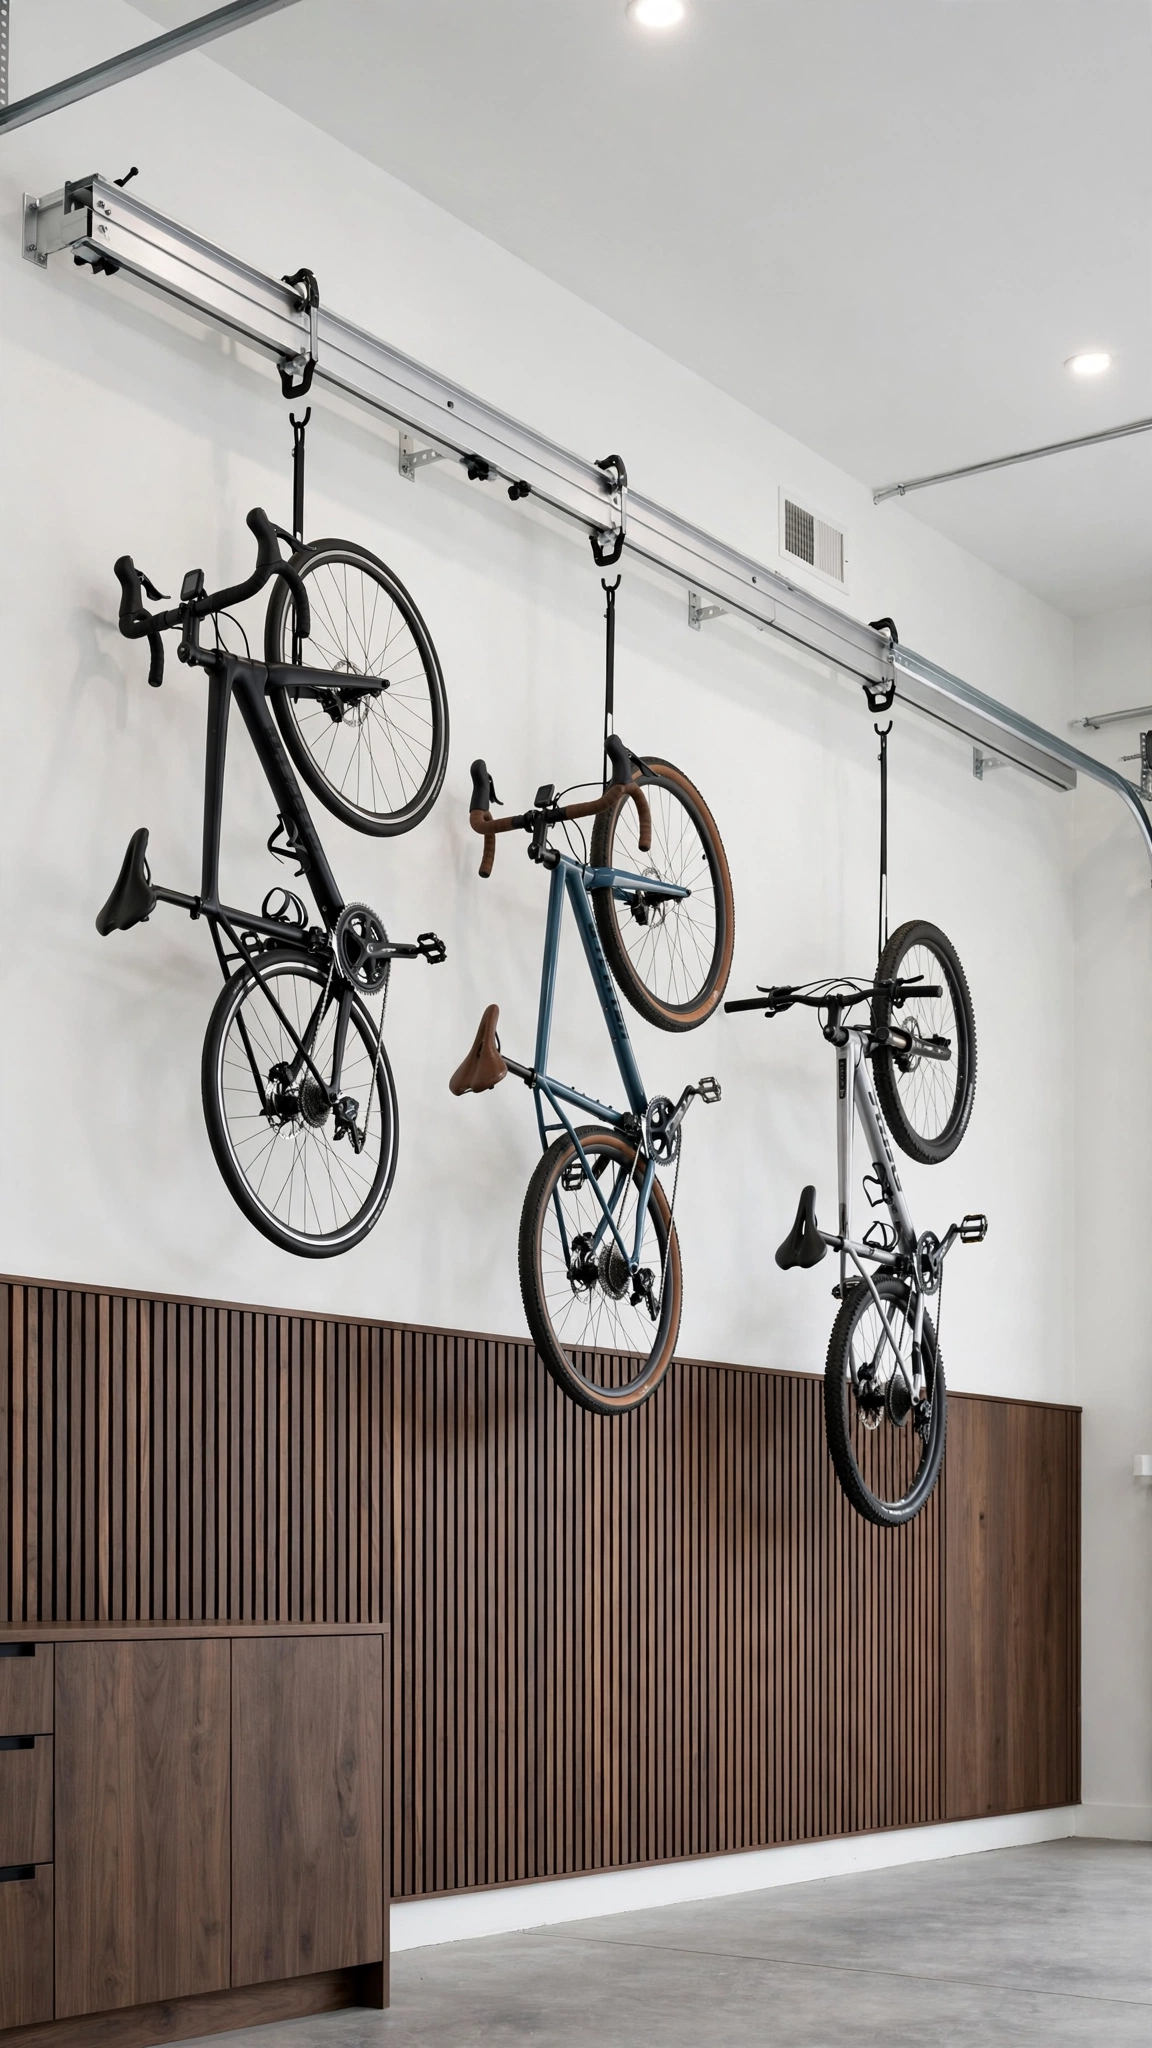
A sliding rail lets each bike glide sideways along the wall, so you can shuffle bikes apart to grab the one in the middle without unhanging the others. It’s like a closet rod for bicycles.
Mount the rail at about six feet high on a solid wall, using heavy-duty lag bolts into studs. The sliding hooks usually include a locking tab so bikes don’t drift on their own.
This system shines in narrow garages where you can’t swing a bike out easily. Slide, lift off, and ride — the whole motion takes seconds.
Pro tip: A rail system works best on a freshly organized wall — these garage interior wall ideas show how to prep the surface first.
3. Hang Bikes from Ceiling Hoists
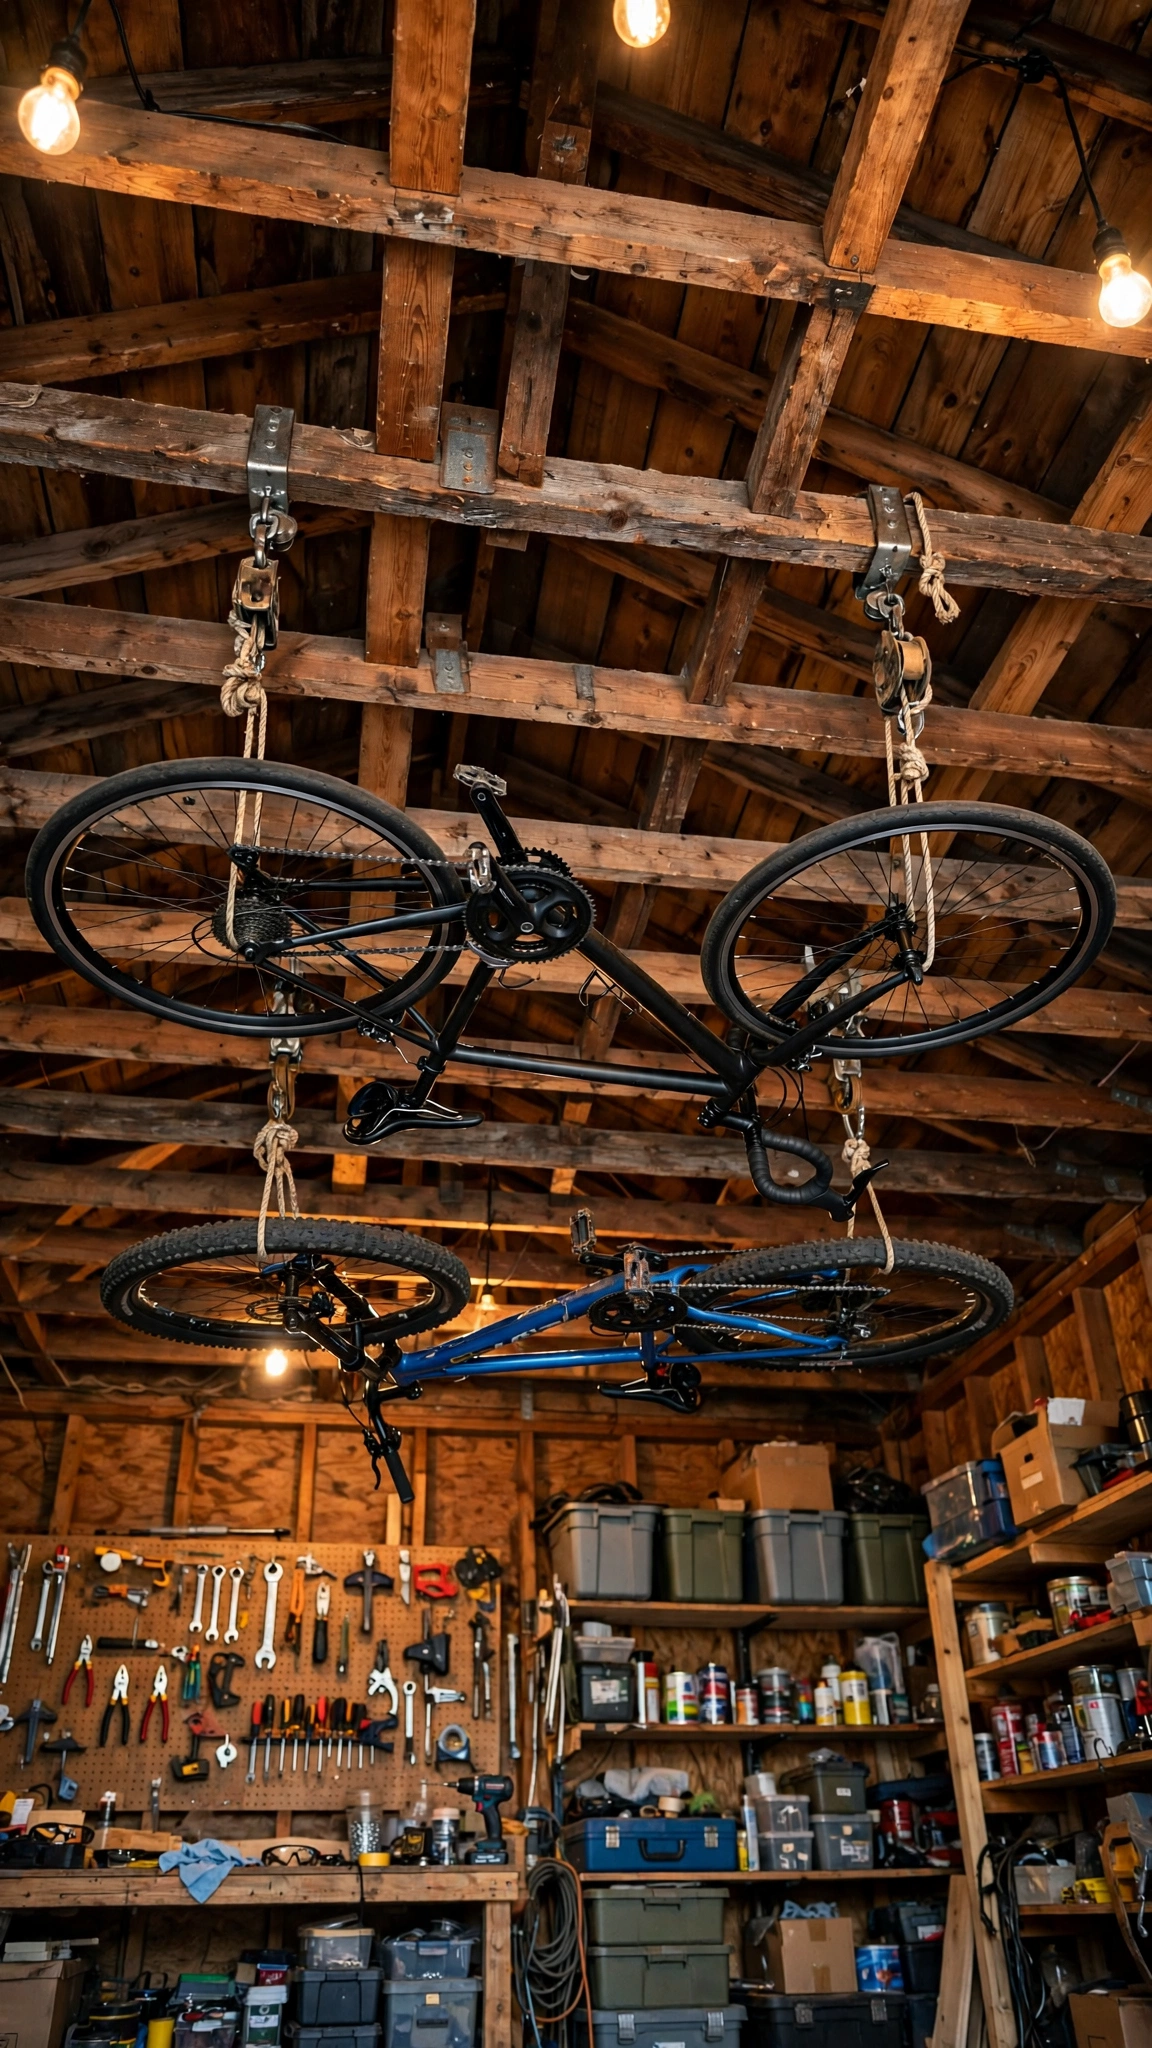
Ceiling hoists use the most wasted space in any garage: the air above your head. A simple pulley system lifts the bike flat against the ceiling with a gentle pull of the rope.
They’re ideal for seasonal bikes — the road bike you won’t touch until spring can live overhead all winter. Most hoists handle up to 50 pounds, which covers nearly every bike.
Installation takes about twenty minutes per hoist: two ceiling brackets into joists, thread the rope, and attach the hooks to the handlebars and seat. Always test with a controlled lower first.
Pro tip: Overhead space is prime real estate — combine hoists with these garage storage shelf ideas to use every inch up high.
4. Build a Freestanding Bike Rack
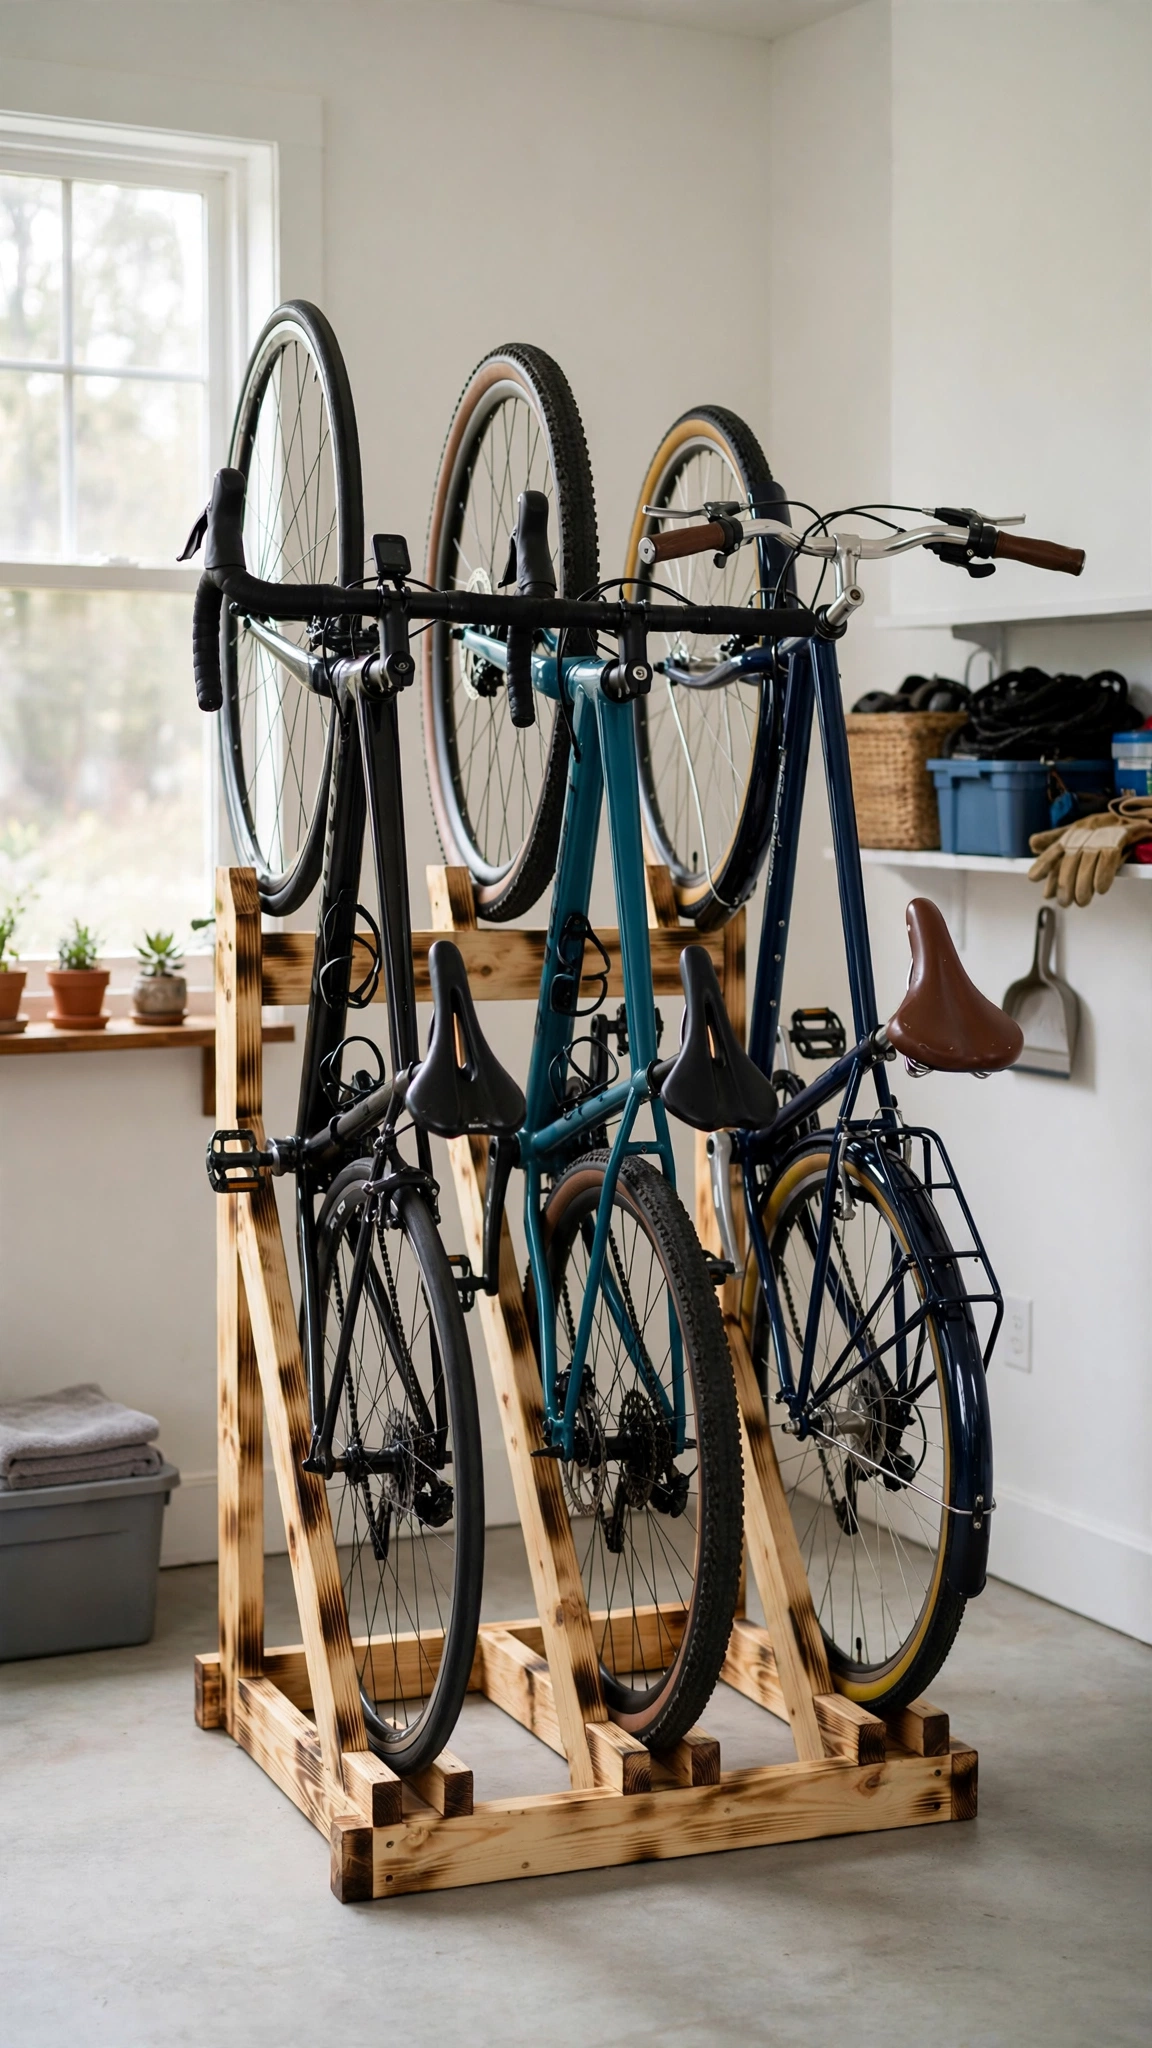
Renters and drill-shy homeowners love freestanding racks: no holes in the wall, no ceiling mounts, just a sturdy frame the bikes slot into. You can build one from 2x4s in an afternoon.
The classic design is a simple ladder-like frame with slots that cradle each wheel. Space the slots about 14 inches apart so handlebars clear each other.
The beauty is portability — slide the whole rack to clean behind it, or take it with you when you move. Add felt pads where wheels touch wood to prevent scuffs.
Pro tip: A freestanding rack fits perfectly into a workshop corner — get the layout right with these garage workshop layout ideas.
5. Use a Wall-Mounted Folding Rack
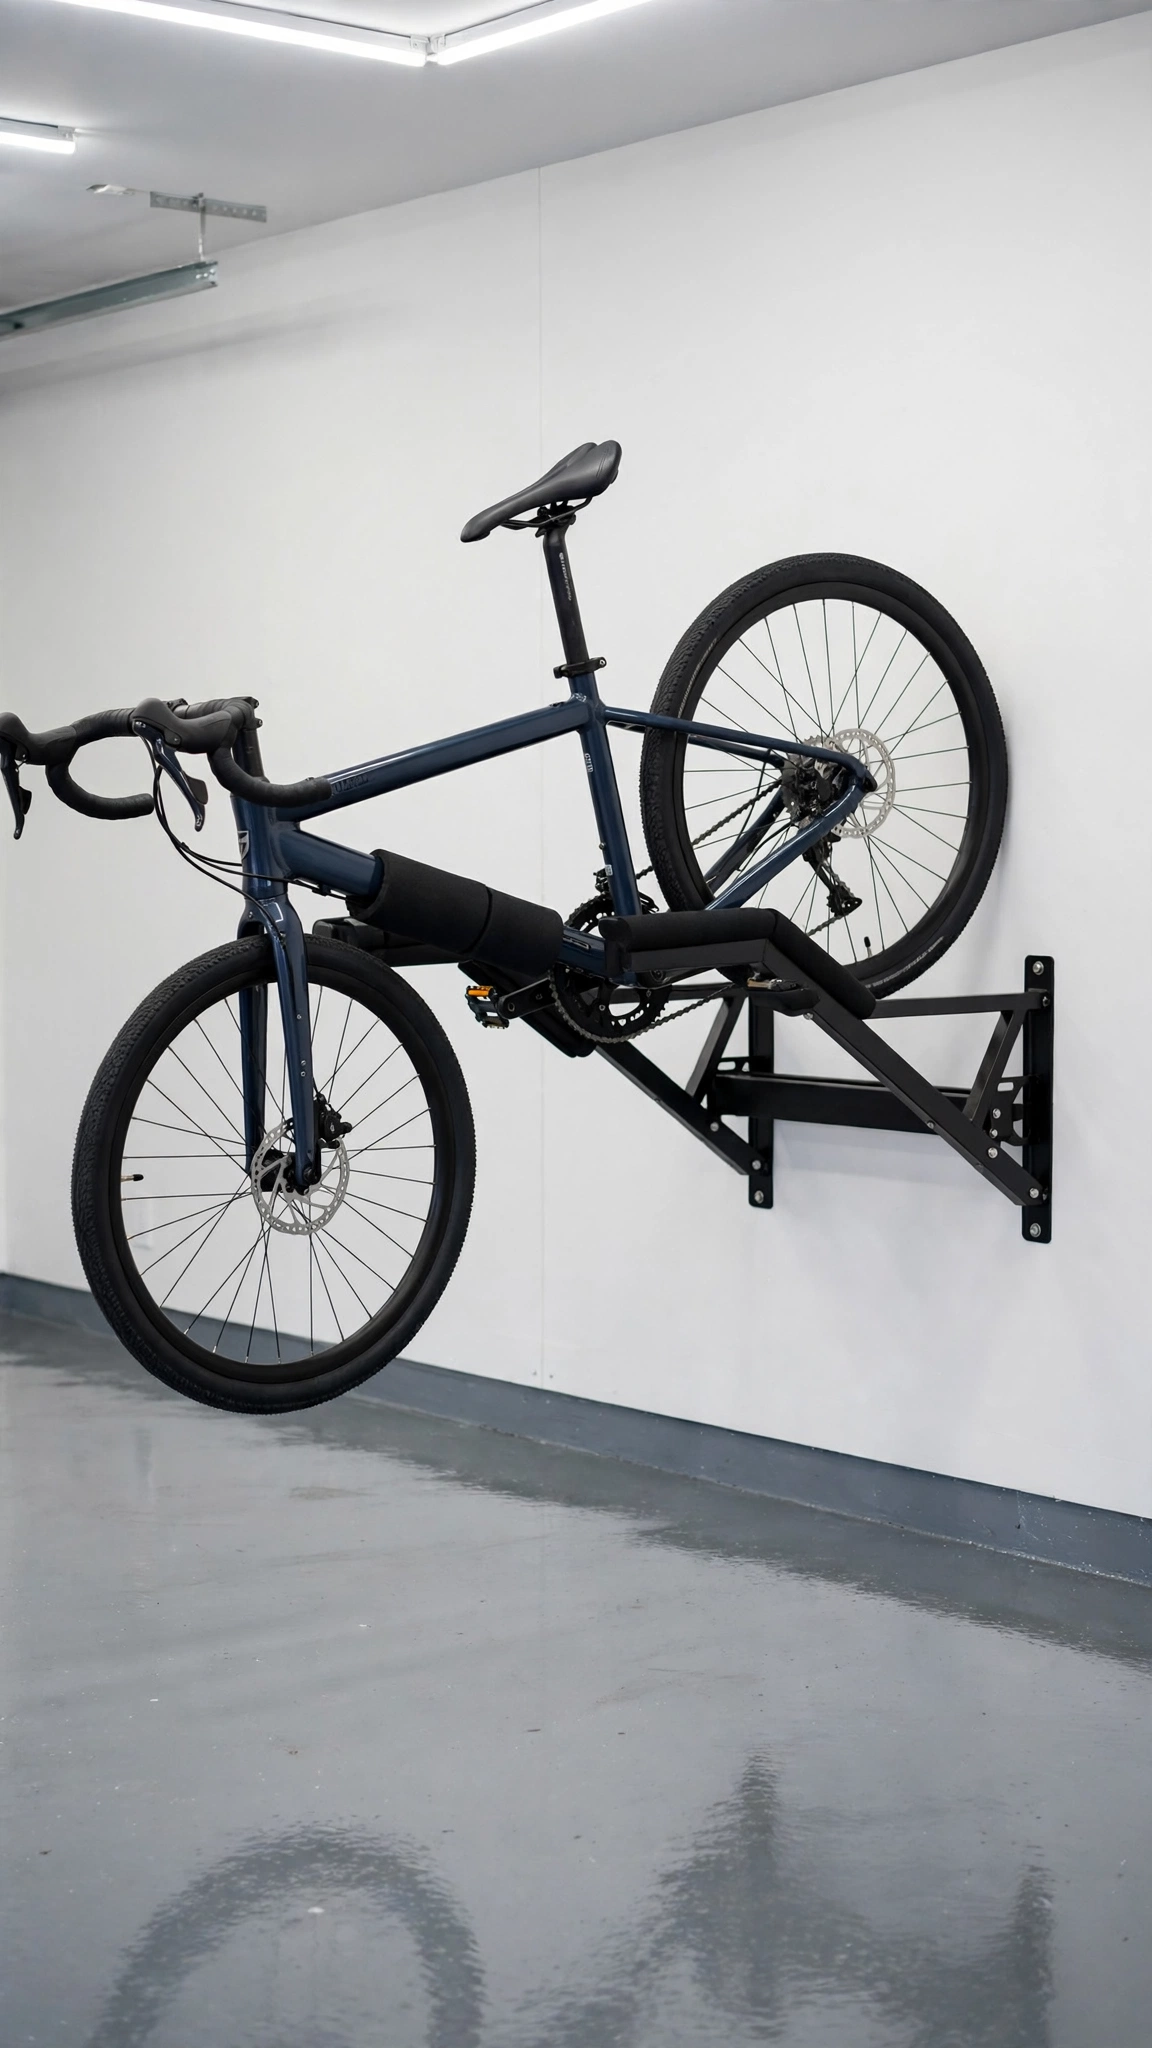
Folding racks give you the best of both worlds: a rock-solid horizontal bike mount when you need it, and a flat-against-the-wall profile when you don’t. Just flip the arms down and lift the bike in.
The padded cradles grip the top tube, so the bike sits level and stable — much easier to load than a vertical hook, especially for heavier e-bikes or step-through frames.
When the bike’s out for a ride, fold the arms up and the wall is completely clear for car doors or projects. It’s the tidiest-looking option on this list.
Pro tip: Folding racks look sharpest on a finished wall — browse these garage upgrade ideas for a designer-worthy backdrop.
6. Dedicate a Bike Storage Corner

Instead of scattering bikes around the garage, give them one official home: a dedicated corner with hooks at adult and kid heights, plus a small bench for helmets, gloves, and shoes.
Use painter’s tape to mark the corner’s footprint on the floor first — about four by six feet handles a family of four. Everything bike-related lives inside that zone, nothing outside it.
Kids are far more likely to put bikes away when the spot is obvious and their hooks are low enough to reach. Add a small rug or mat to catch drips after rainy rides.
Pro tip: A bike corner doubles as a mudroom-style drop zone — steal layout tricks from these garage mudroom ideas.
7. Install Horizontal Wall Brackets
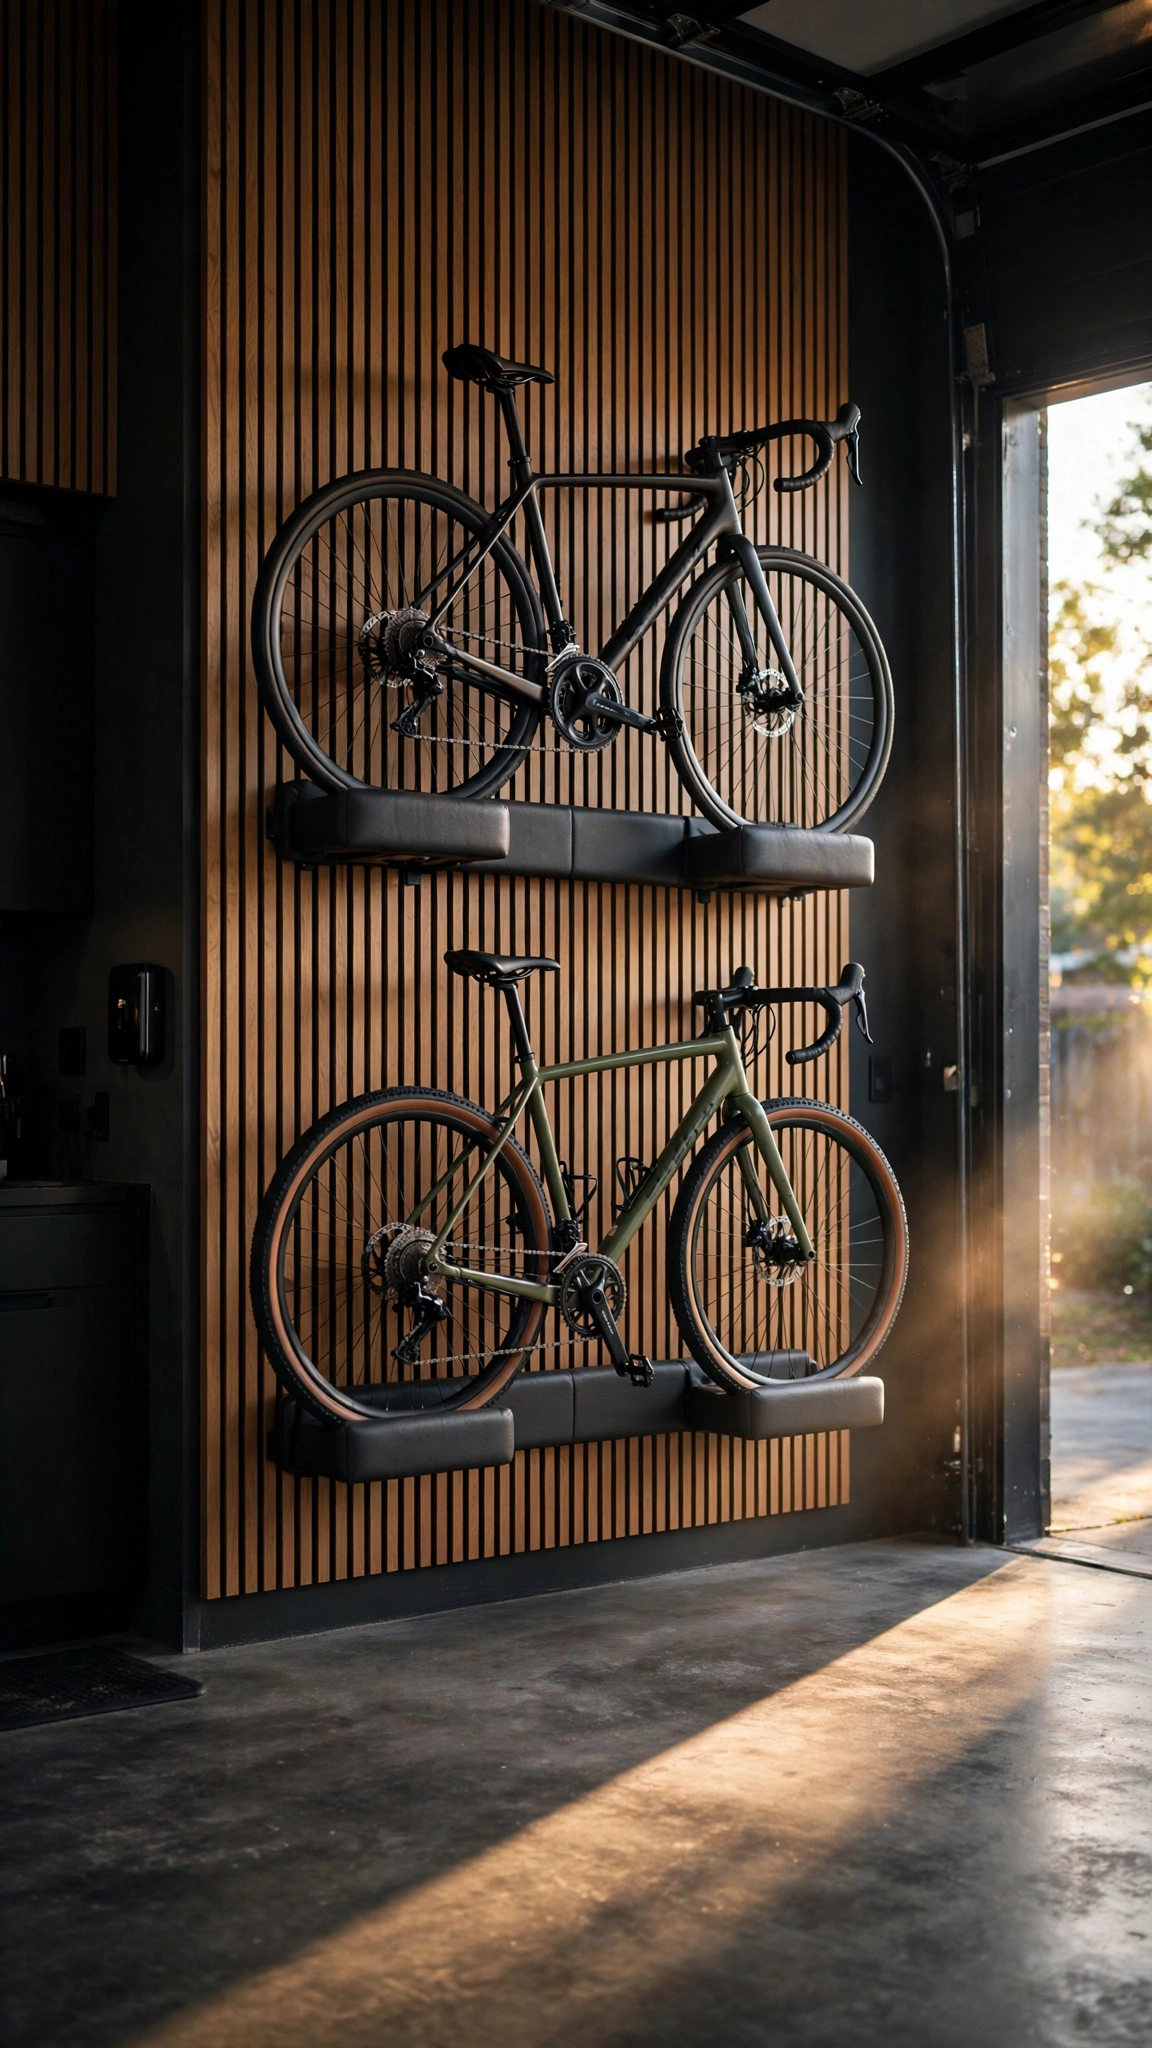
Horizontal brackets hold the bike parallel to the wall, top tube resting in two padded arms. It displays the bike almost like wall art — perfect if you own a beautiful bike worth showing off.
This method needs about six feet of horizontal wall per bike, so it suits wide, open walls. The payoff is effortless loading: no lifting the bike overhead, just set it into the cradles.
Choose brackets with adjustable arms to fit different frame geometries, and add a small drip tray underneath if you ride in wet weather.
Pro tip: Horizontal mounts turn bikes into decor — make the wall behind them stunning with these garage interior design ideas.
8. Tuck Bikes Under a Loft Platform
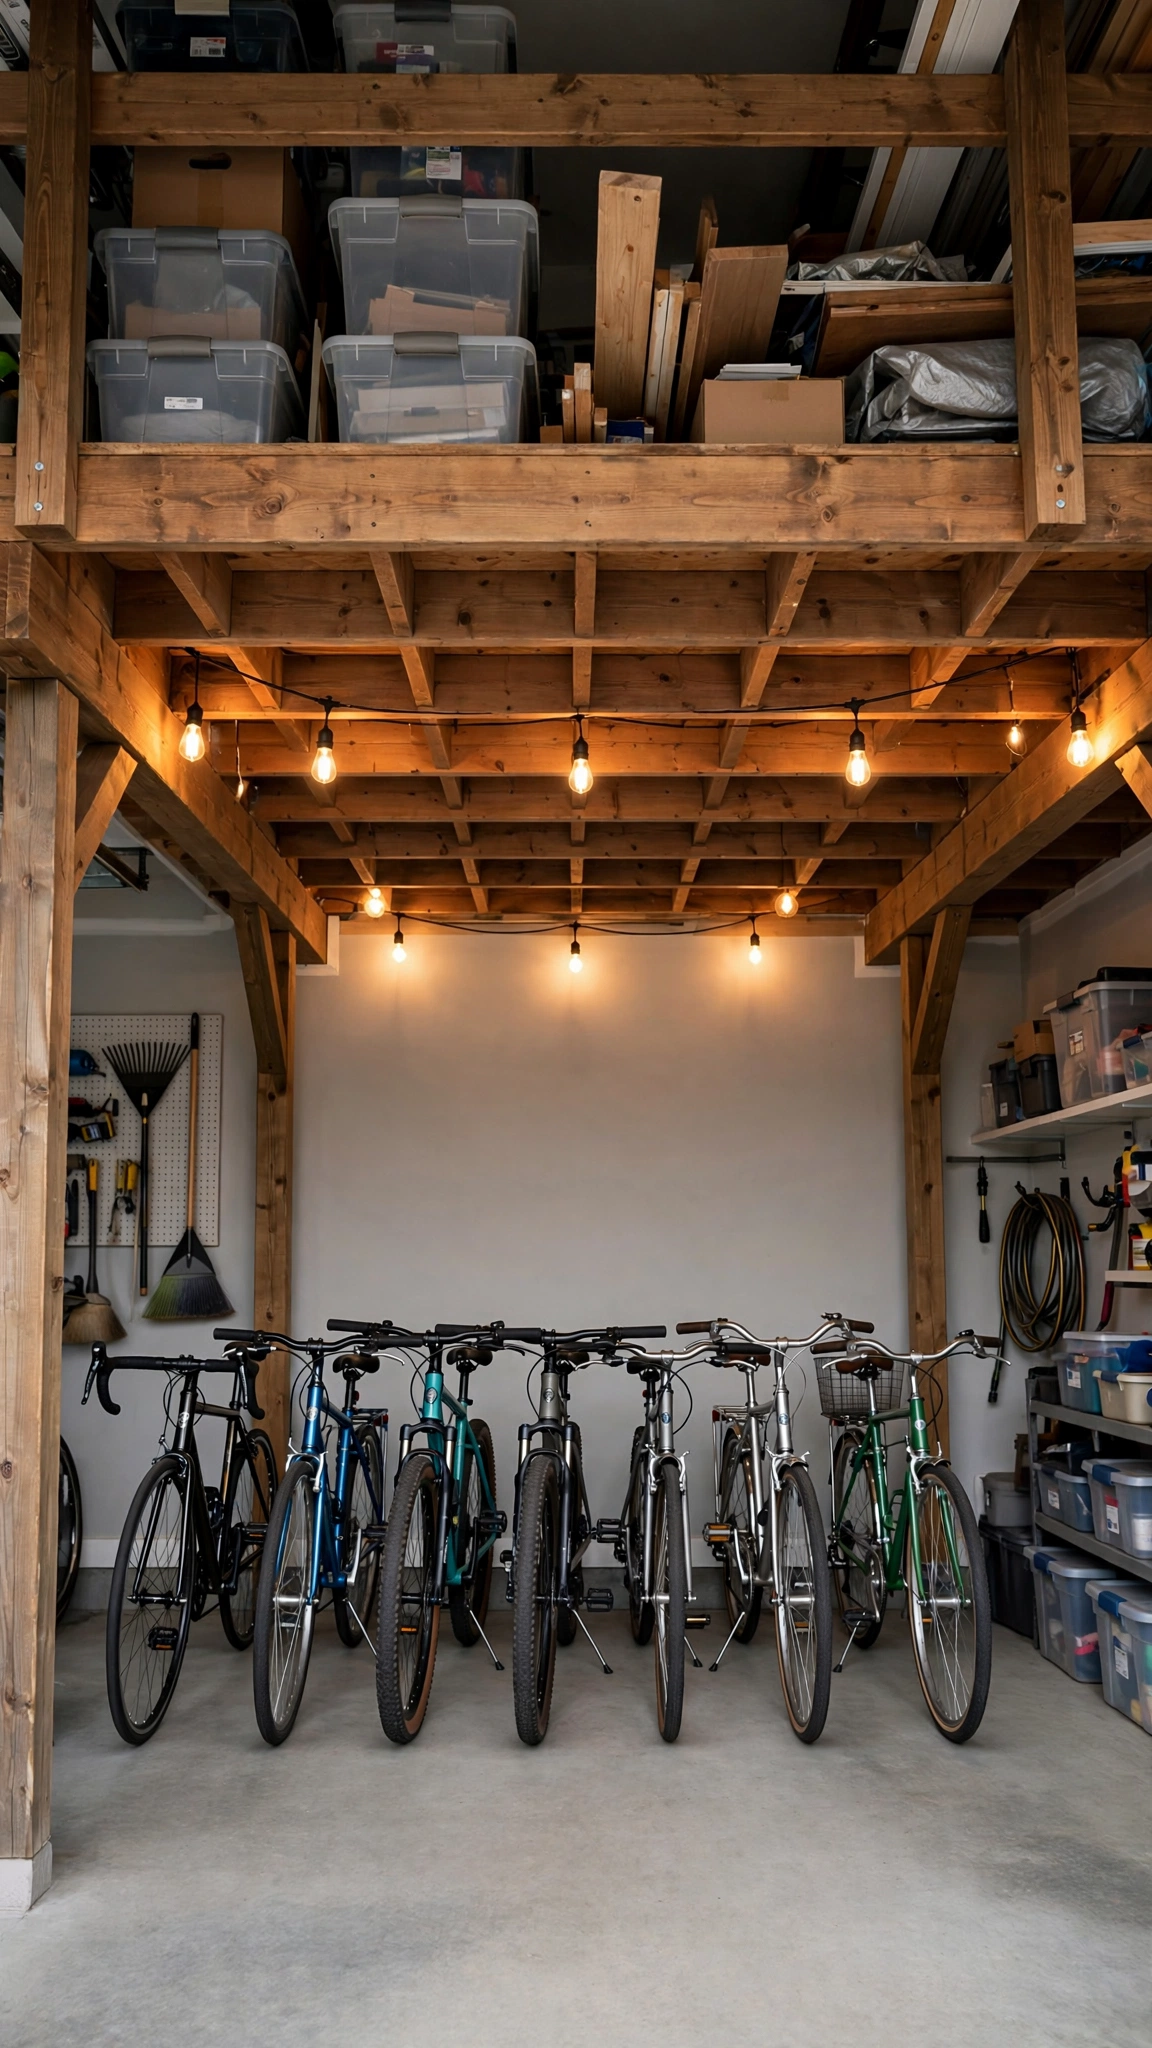
If your garage has high ceilings, a loft platform creates a whole second floor for storage — and the space underneath becomes a natural, sheltered bike parking bay.
Build the platform at least seven feet high so handlebars clear it comfortably. The bikes roll straight in underneath, protected from anything stored above.
This is a bigger weekend project, but it roughly doubles your garage’s usable storage. Line the parking bay with interlocking floor tiles to define the zone and protect the concrete.
Pro tip: A loft changes the whole garage — plan the full transformation with these garage renovation ideas.
9. Use Pulley Systems for Heavy E-Bikes
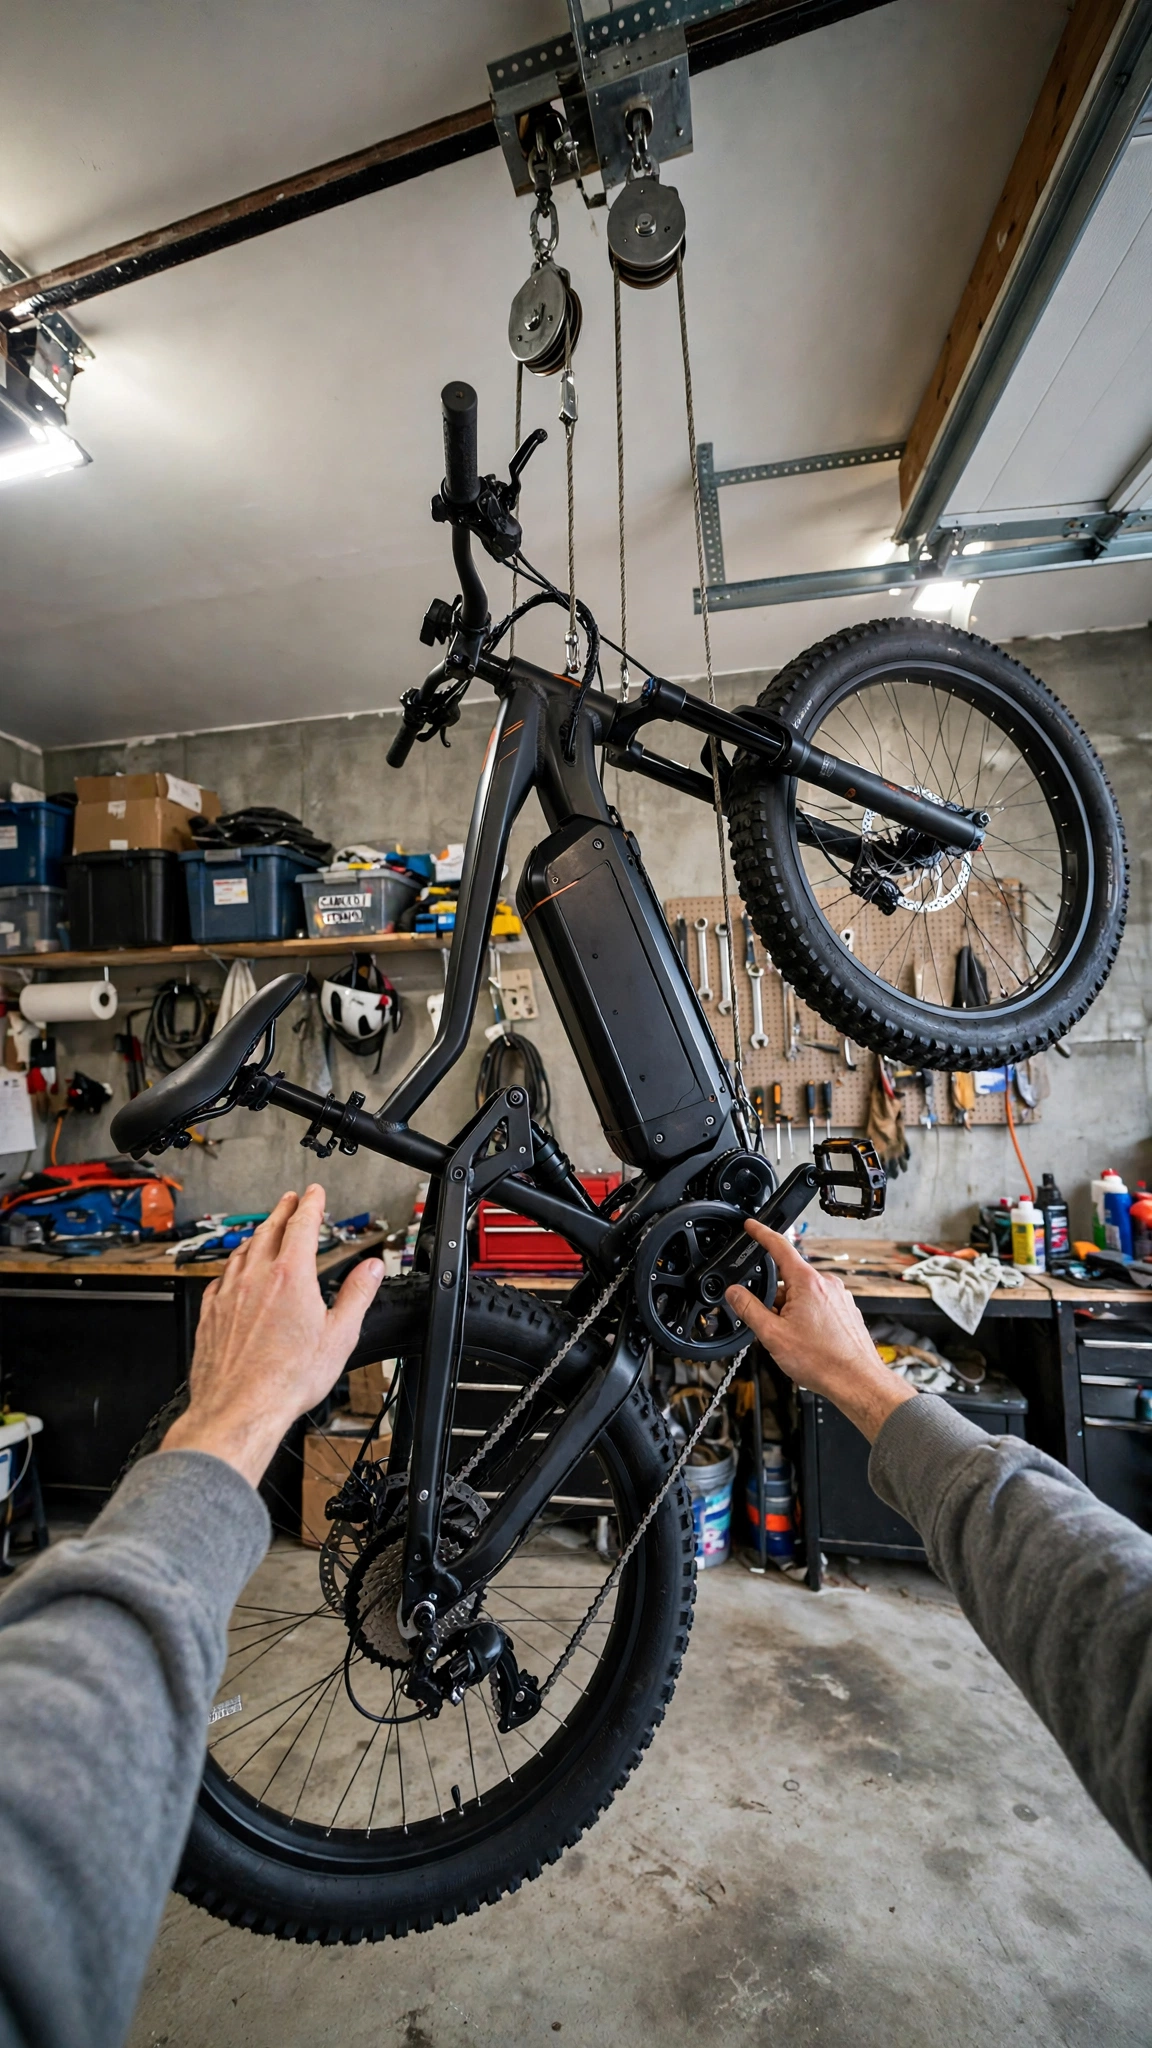
E-bikes are wonderful to ride and terrible to lift — many weigh 50 to 70 pounds. A mechanical pulley hoist does the heavy work, letting you raise the bike to the ceiling with one hand.
Look for hoists with a 4:1 or 6:1 pulley ratio, which turns 60 pounds into a 10-pound pull. The locking mechanism holds the bike at any height, so there’s no risk of it slipping.
Mount into ceiling joists, never just drywall, and keep the pull rope cleated to a wall hook when not in use so it doesn’t dangle into the car’s path.
Pro tip: Heavy e-bikes need solid mounting points — make sure your ceiling is up to it with guidance from these garage lift ideas.
10. Mount Bikes Above the Workbench
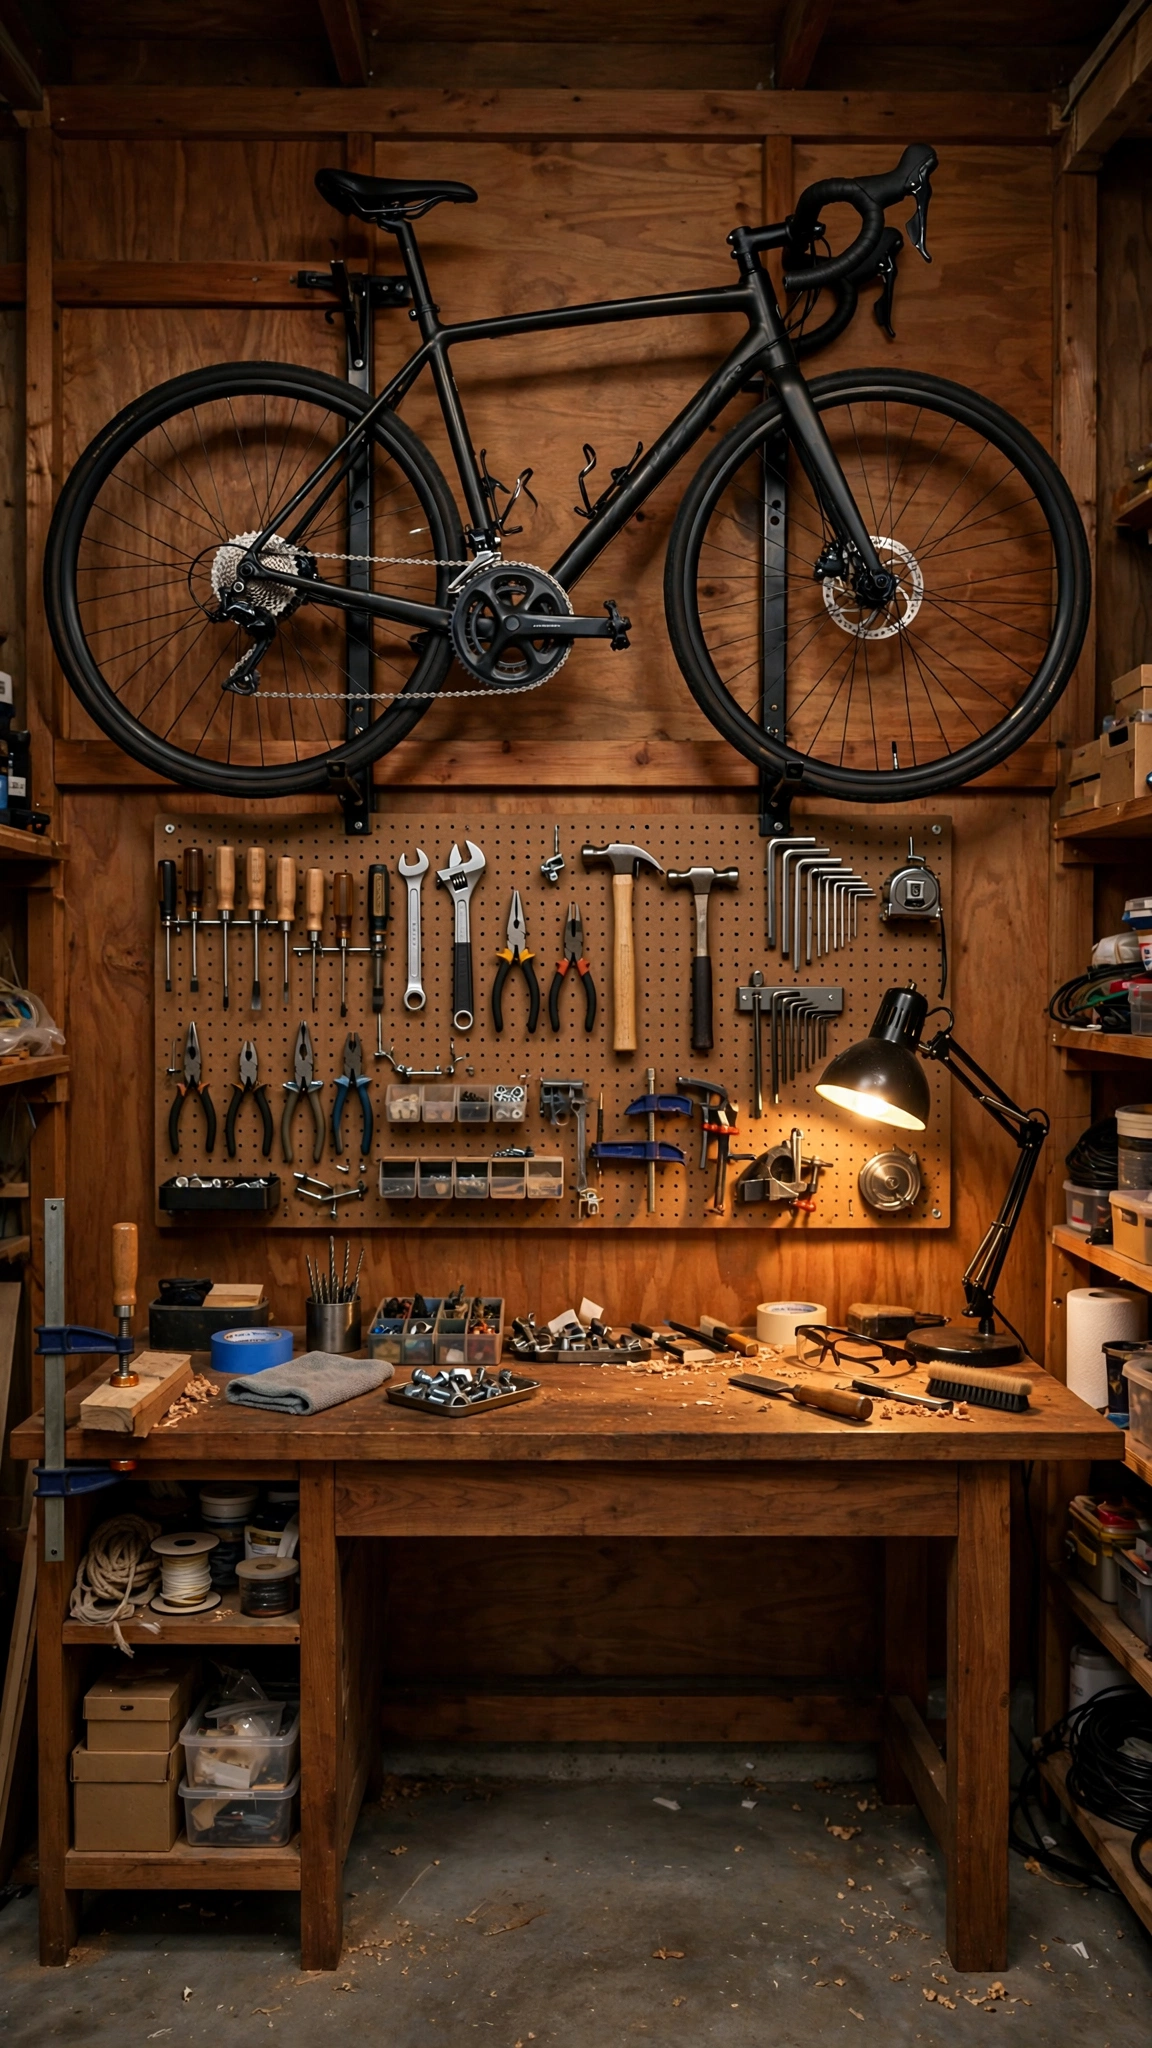
The wall above your workbench is usually empty air — perfect for a bike. Mounted horizontally up high, it’s out of the way yet still easy to grab for maintenance.
This placement is genius for cyclists who wrench on their own bikes: lower it straight onto the workstand below. Keep the brackets at least a foot above your head height to avoid bumps.
Dust is the only downside, so wipe the bike down occasionally or drape a lightweight cover over it between rides.
Pro tip: Combine bike storage with a proper repair station using these garage workshop ideas.
11. Add a Rolling Bike Dock

A rolling dock holds bikes upright by the wheels on a stable, wheeled base. Roll it out for a group ride, roll it back against the wall when everyone’s home.
This is the most flexible option on the list — no installation at all. It’s perfect if your garage layout changes with the seasons, like making room for winter car storage.
Look for docks with locking casters so the whole thing doesn’t wander, and wheel slots wide enough for fat tires if anyone rides them.
Pro tip: Rolling storage pairs well with a clutter-free floor — get the foundation right with these garage gym design ideas that also prize open floor space.
12. Build a Plywood Bike Slot Rack
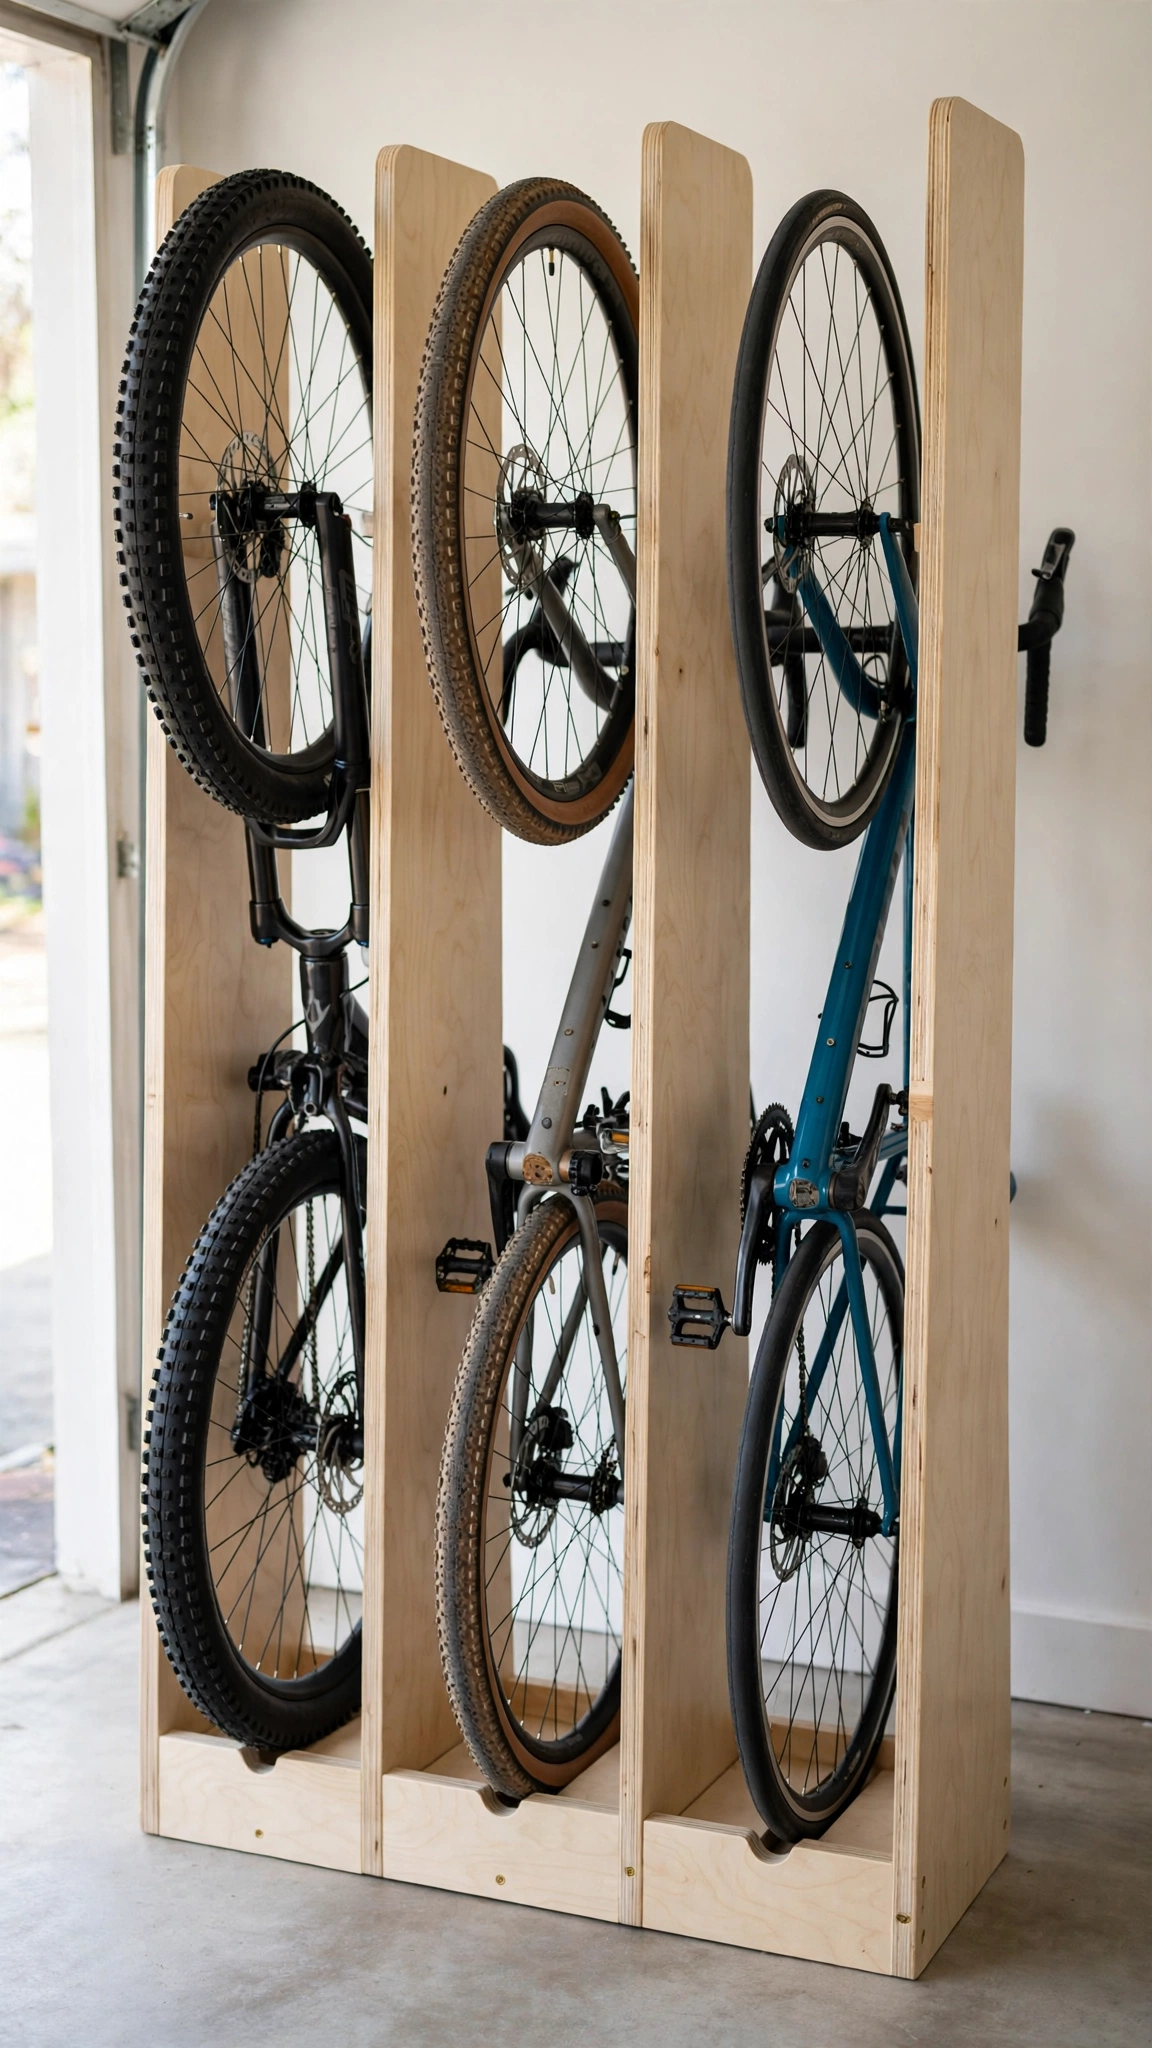
A sheet of plywood, a jigsaw, and an hour of your time: that’s all a slot rack needs. Cut vertical slots that grip each bike’s wheel, and the bikes stand upright in a neat row like books on a shelf.
Make the slots about two inches wide for road tires, wider for mountain bikes. Sand the edges smooth and seal the plywood so it shrugs off damp tires.
This is the cheapest serious bike storage you can build — under twenty dollars in materials — and it looks surprisingly sharp painted to match your walls.
Pro tip: A slot rack is a great first DIY — level up your skills with these garage cabinet ideas for your next build.
13. Hang Kids’ Bikes on Low Hooks

Kids will never hang a bike on a hook they can’t reach. Mount sturdy hooks at three to four feet high — low enough for little arms — and suddenly the kids’ bikes stop living in the driveway.
Use the same vertical-hang technique as adult hooks, just lower. Bright-colored hooks help kids identify their own spot, and each hook gets a name label for extra ownership.
Keep the floor beneath clear with a small mat; kids are still learning to hang carefully, and a soft landing protects both bike and concrete.
Pro tip: Kid zones work best in a family-friendly garage — see how to set one up in these garage man cave ideas for multi-use spaces.
14. Install a Rotating Bike Tower
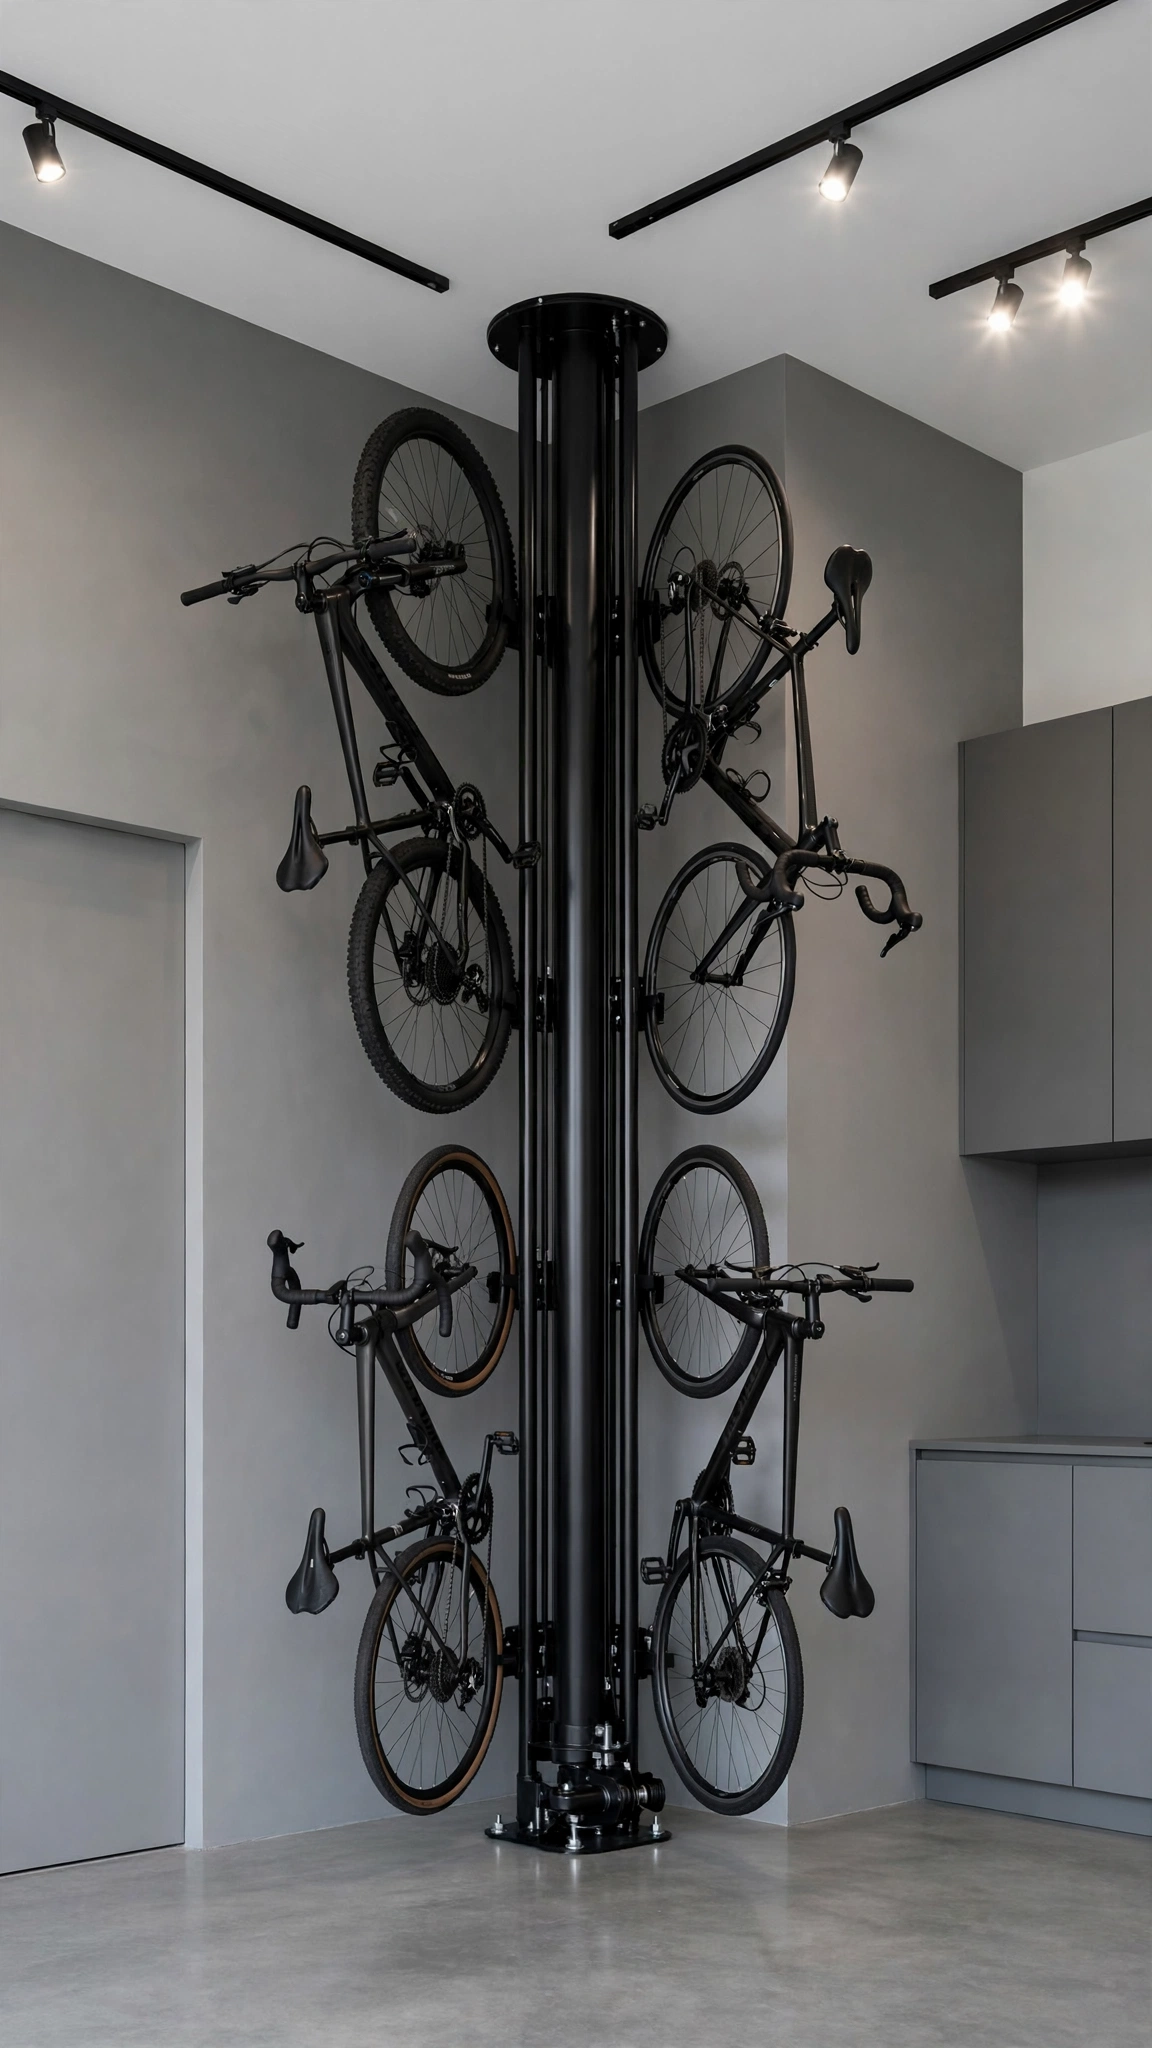
A rotating tower stores four bikes in the footprint of one. Each bike hangs vertically from its own arm; spin the column to bring the bike you want to the front.
This is the ultimate solution for bike collectors or families with four-plus bikes and zero spare wall space. The tower stands in a corner and needs no mounting at all.
It’s the priciest option here, but nothing else packs this much storage into two square feet of floor. Look for models with a weighted base for stability.
Pro tip: A tower makes a statement — light it like a showpiece with these garage lighting ideas.
Conclusion
Fourteen ideas, one goal: bikes up and out of the way, floor space back where it belongs. Start with the simplest fix that fits your garage — a few wall hooks — and scale up to hoists or a tower as your collection grows. Your garage (and your shins) will thank you.